BOOK 02/25Front of house & tables
Reservations
Customers can book a table online through LINE by themselves. Staff/admins configure the booking rules, confirm or reject requests, check customers in at the shop, and close specific tables for a given date from the “Reservations” menu.
Customer side (booking through LINE)
Log in with LINE
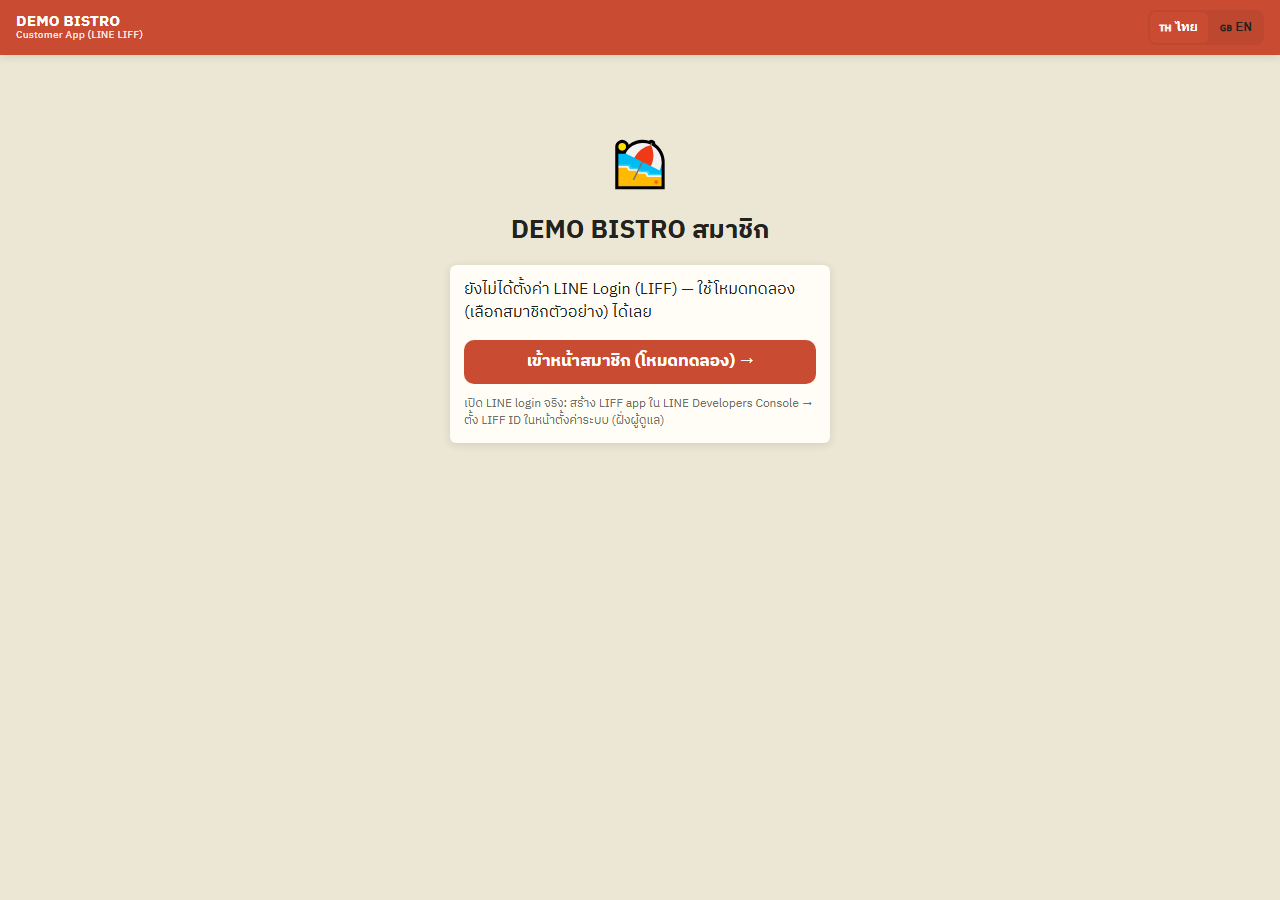
Open the customer reservation page. If not logged in yet, you're redirected to log in with LINE before continuing.
Open full size Enter a phone number (first time only)
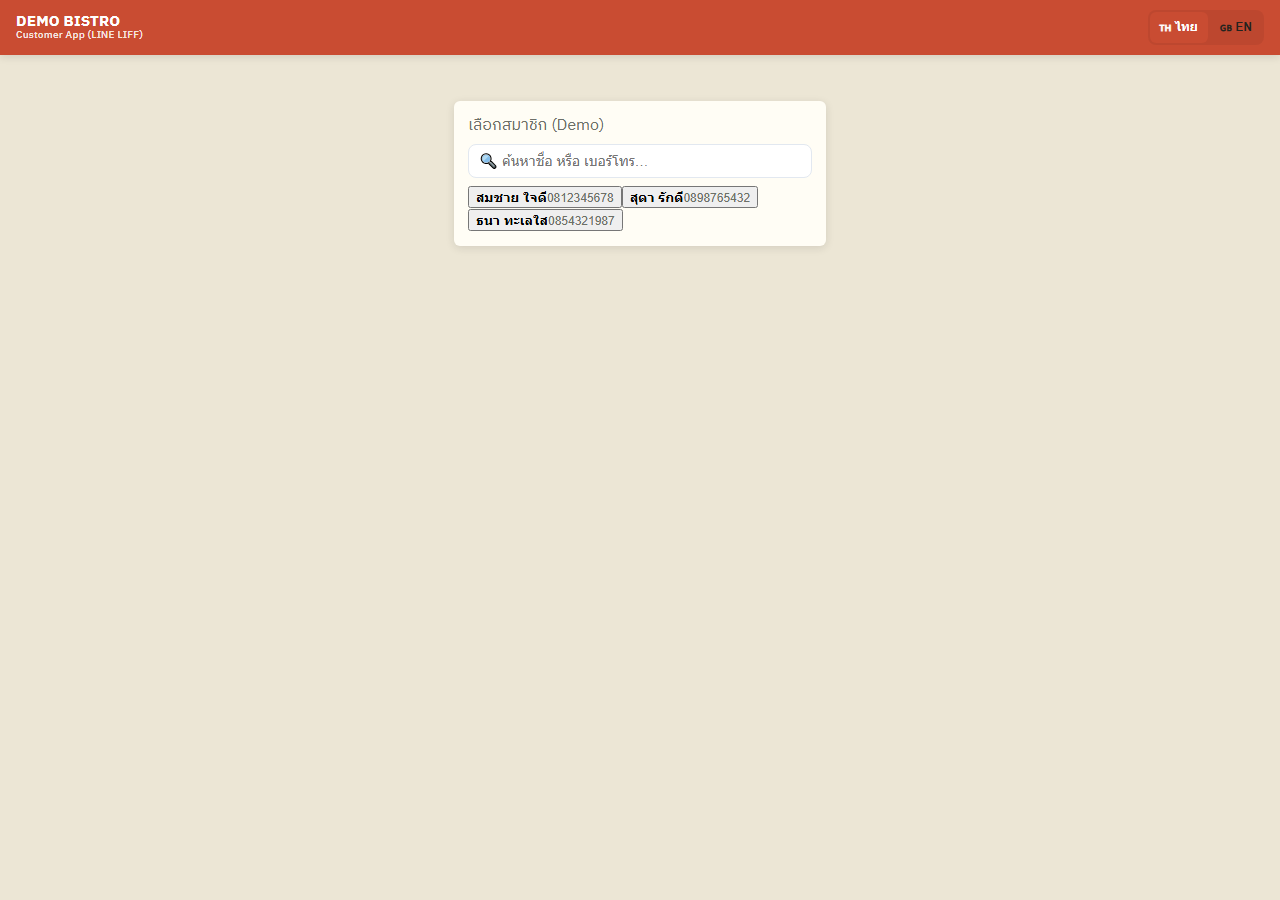
If no phone number is on file yet, you must enter a valid 10-digit mobile number (e.g. 0812345678) before you can book.
Open full size Pick a date (and a time slot, if the shop uses time-slot mode)
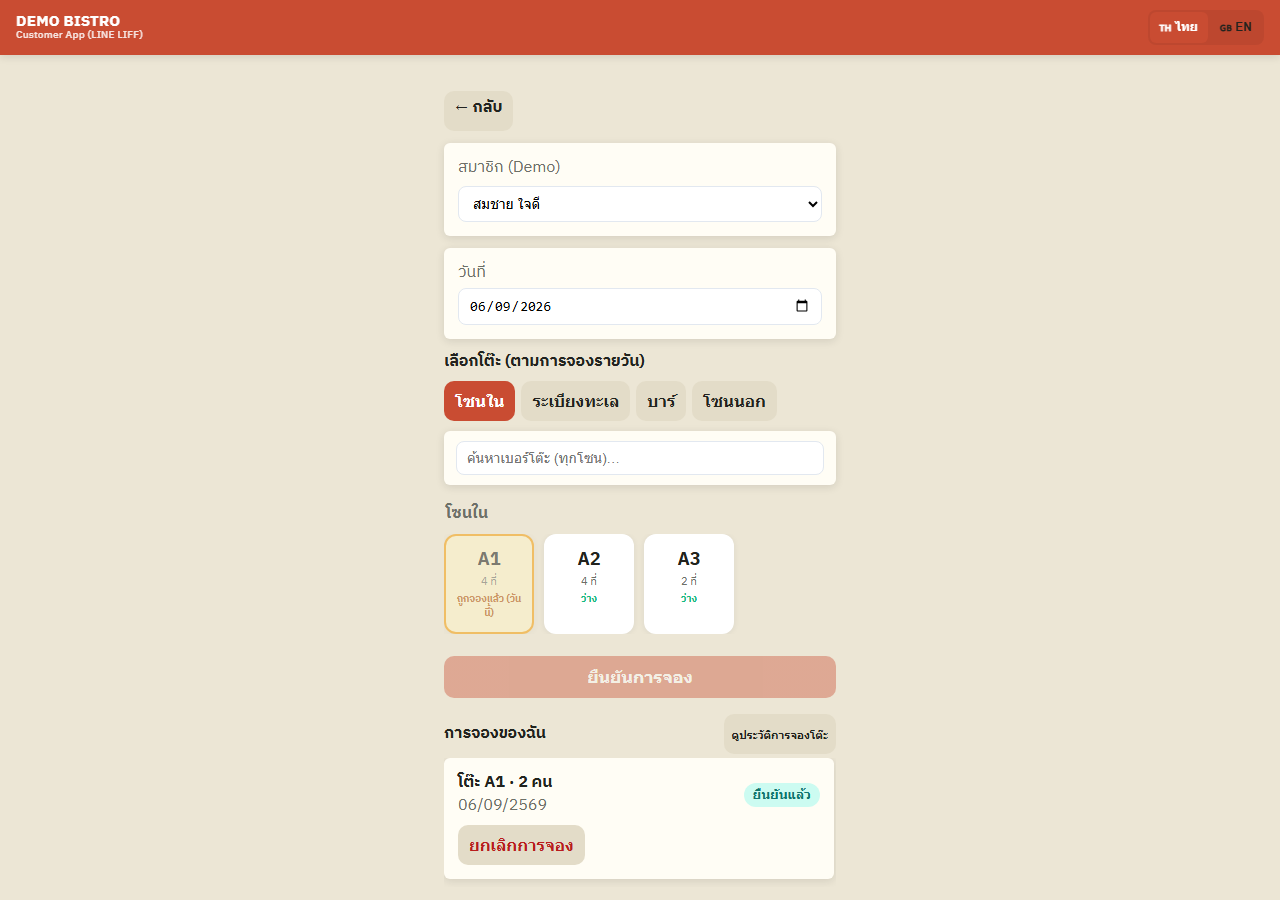
Pick the date you want. Normally the shop books per-day, with no exact time required.
If the shop has “30-minute time slots” turned on, you also need to pick a time slot before you can select a table.
Open full size Choose a zone and table(s)
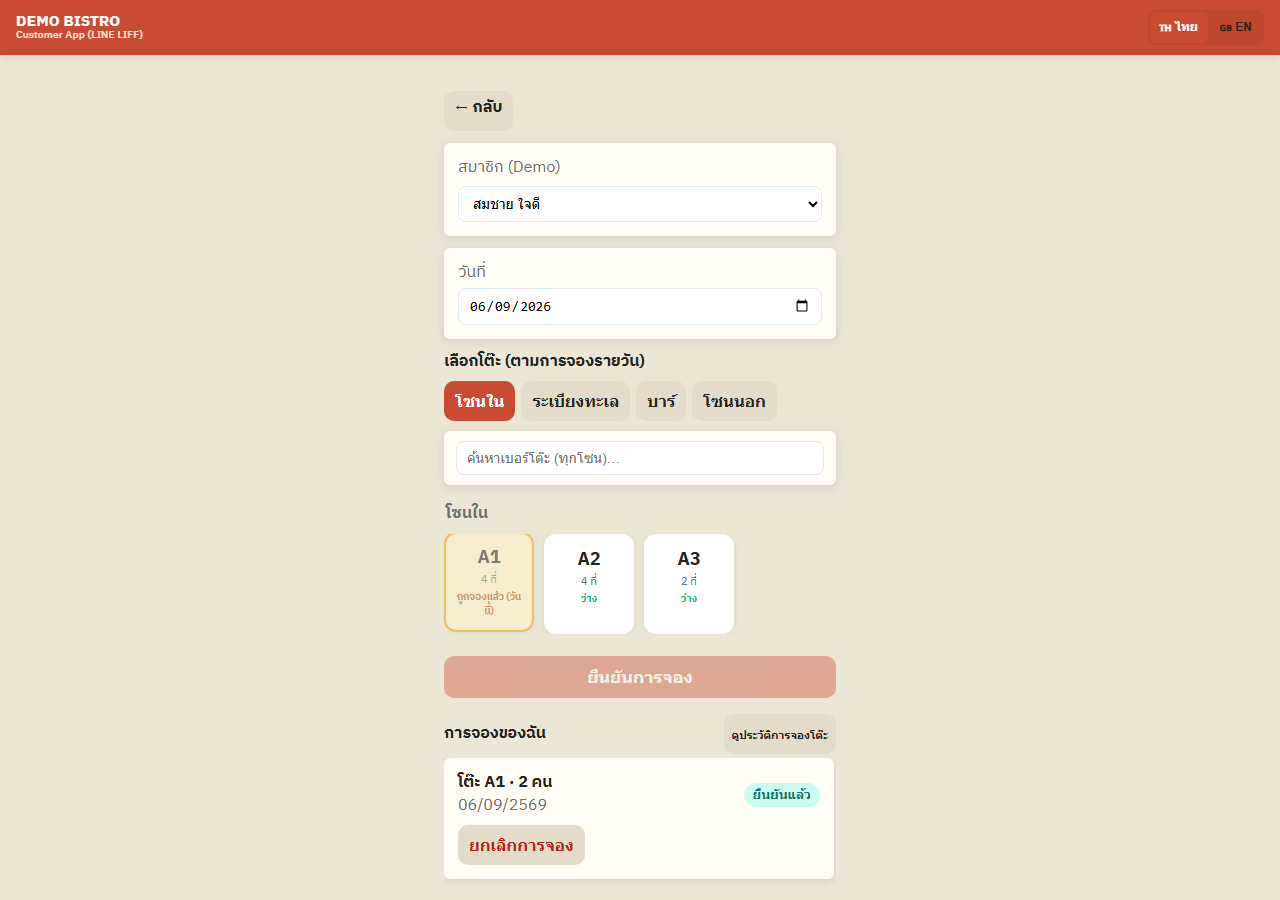
Switch between zones using the tabs at the top, or search for a table number across all zones in the search box.
Tap to select up to the shop's configured maximum number of tables — the total reservation fee is shown before you confirm.
The floor-plan image is illustrative only — actual table selection is always done through the table list/grid below it, not by tapping on the image.
Open full size Confirm the reservation
Press “Confirm reservation”. If the system detects a selected table was just booked or closed by someone else, a warning names exactly which table(s) had the problem.
You must swap out the affected table(s) before you can submit again.
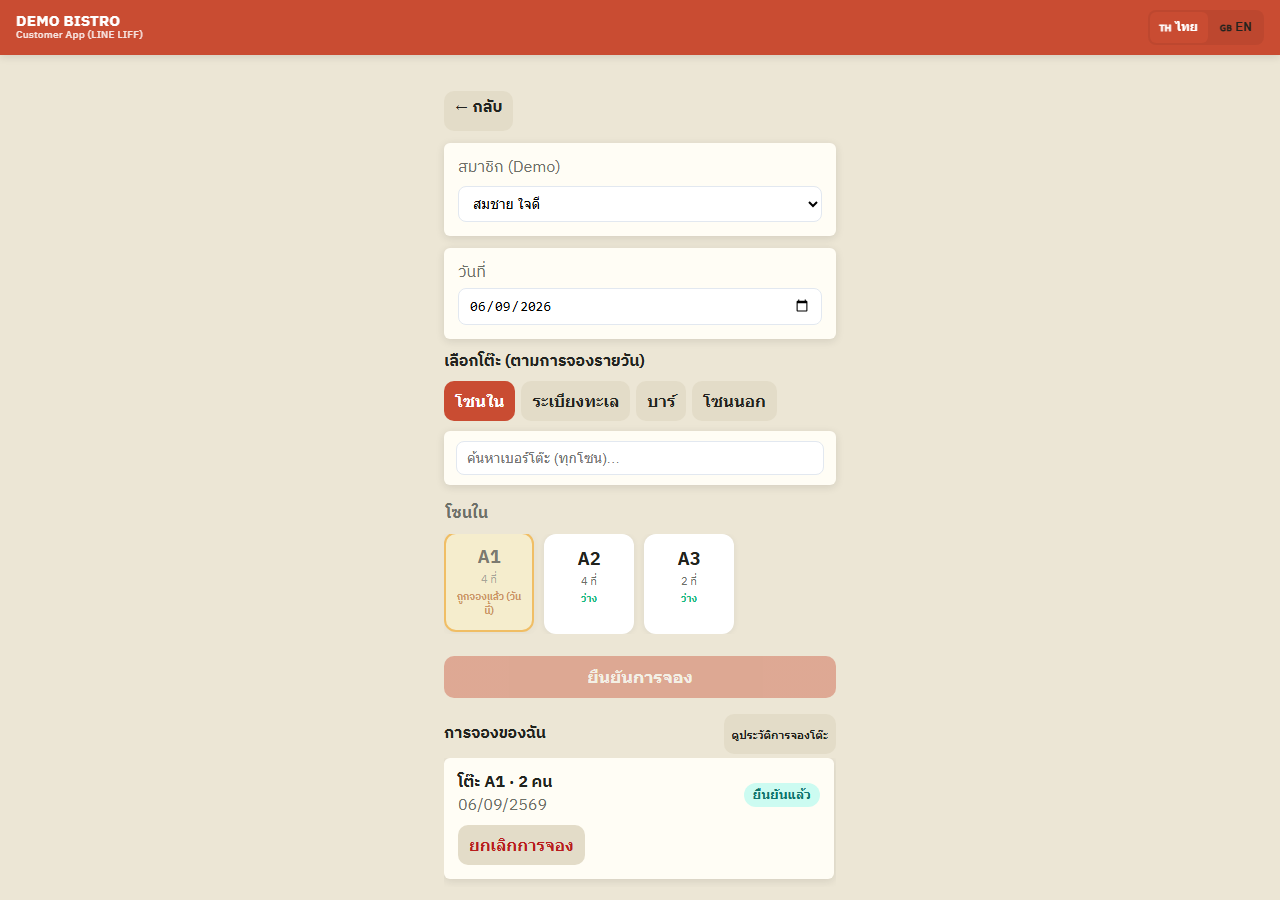
Open full size Pay the deposit (if required)
If the booking requires a deposit, the payment screen opens right away — scan the PromptPay QR to transfer (you can save the QR image too), then upload a photo of the payment slip.
If the slip verifies automatically, the reservation is confirmed immediately; if not, it shows “awaiting staff confirmation”. Once a slip is sent, the hold countdown stops and shows “Slip sent — waiting for staff to confirm”: the booking waits for staff to confirm or reject it instead of cancelling itself when the hold time runs out.
The same payment screen has an optional “Note” field you can use to send a message to the shop, e.g. a window-table request or a heads-up that you'll be late.
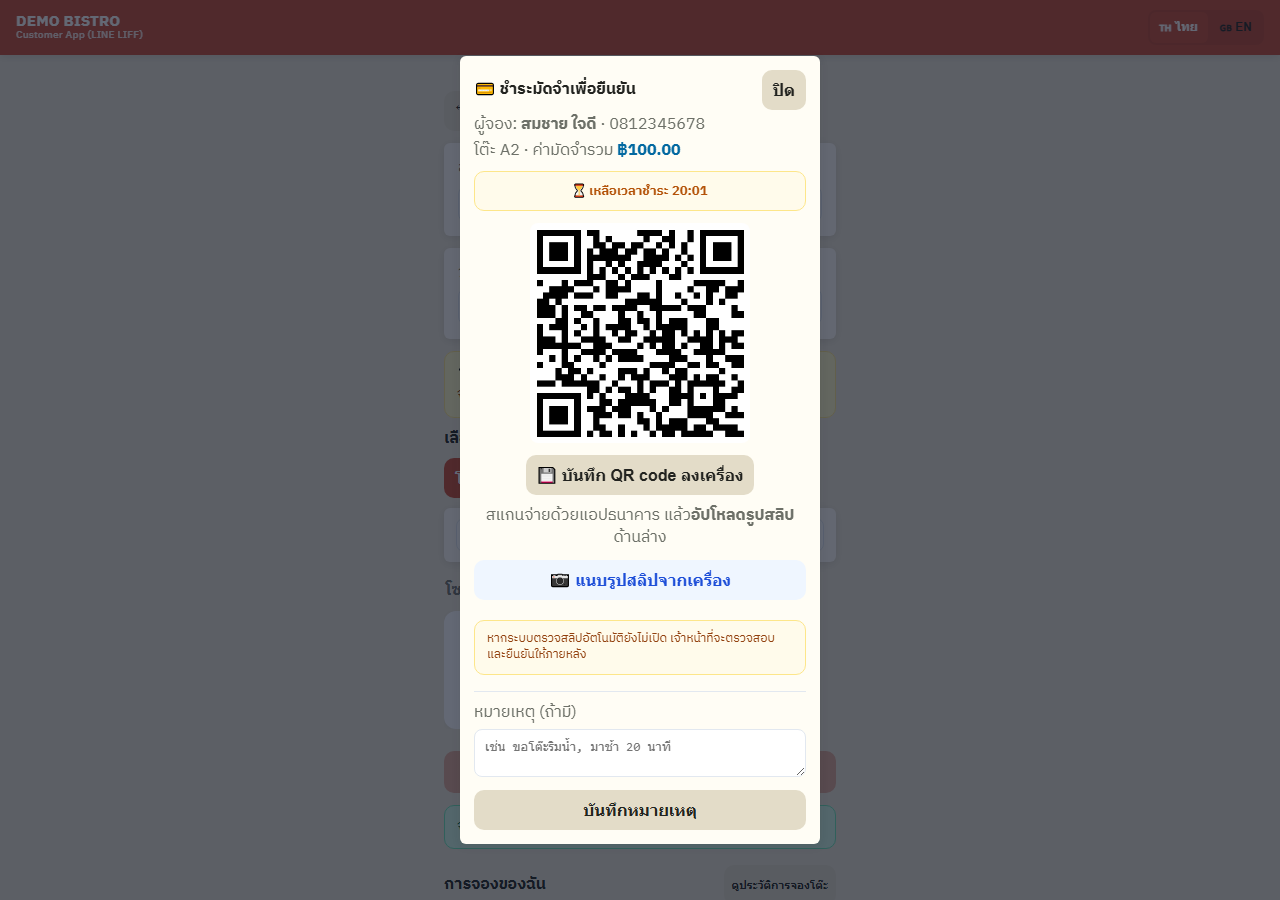
Open full size View / cancel your own reservations
Your own reservation list is on the same page — cancel a booking yourself.
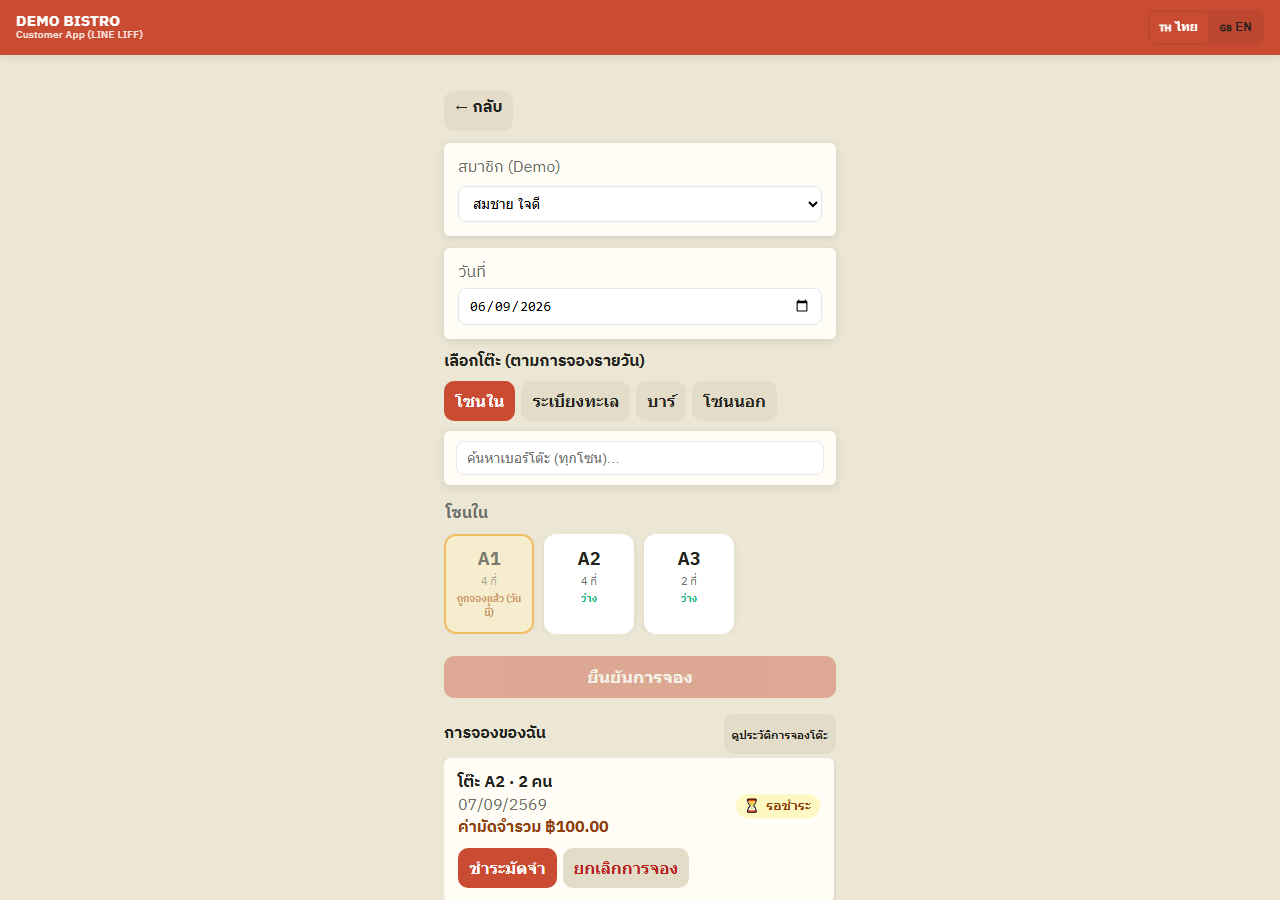
Open full size
Staff / admin side (managing reservations)
Configure the booking rules
Go to the “Reservations” menu, “Settings” tab, to set: the announcement shown to customers, deposit terms, and the maximum number of days ahead a booking can be made.
Also set the same-day booking cutoff time, the no-show grace window and auto-release time, how long a table is held pending deposit payment, and the maximum number of tables per booking.
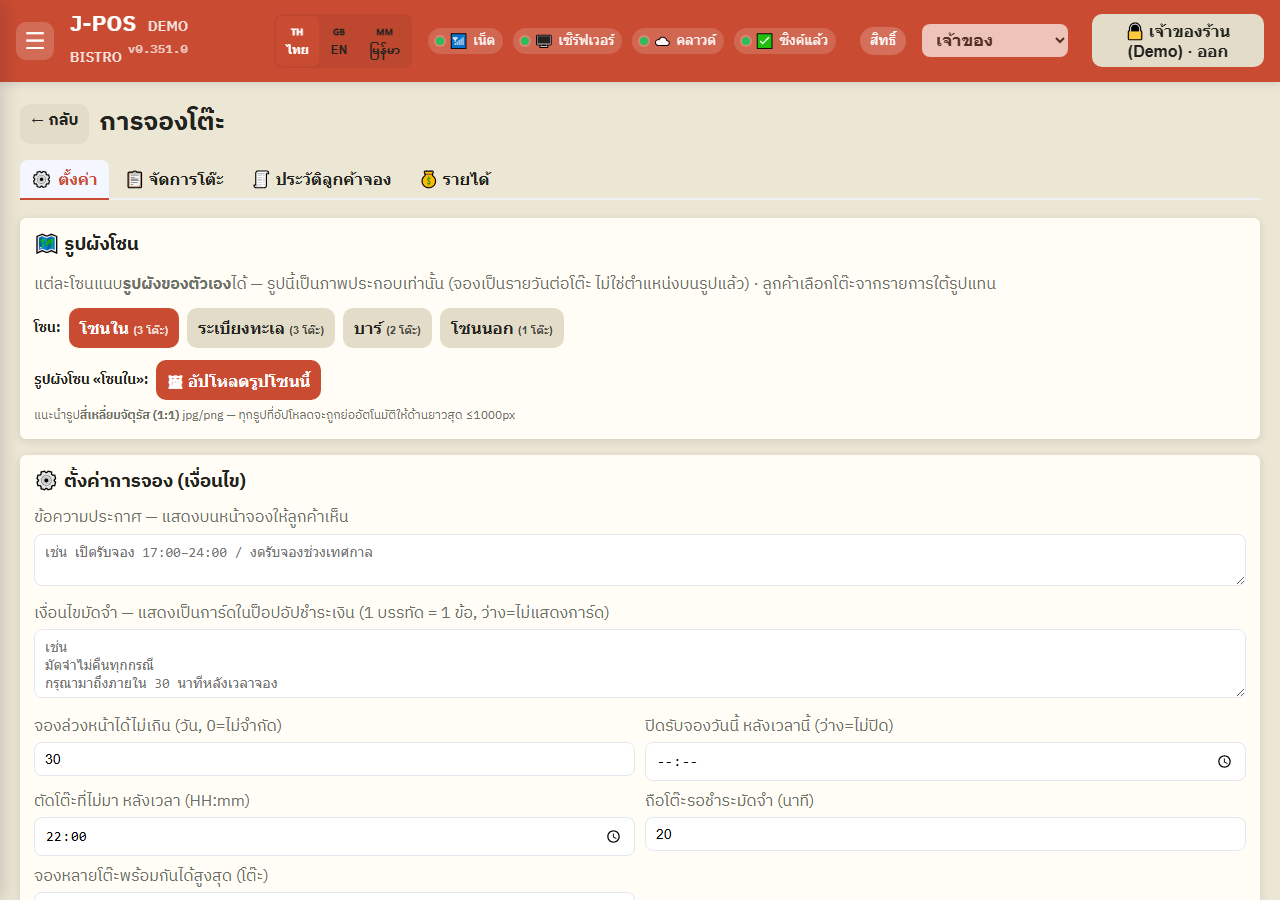
Open full size Confirm or reject a booking request
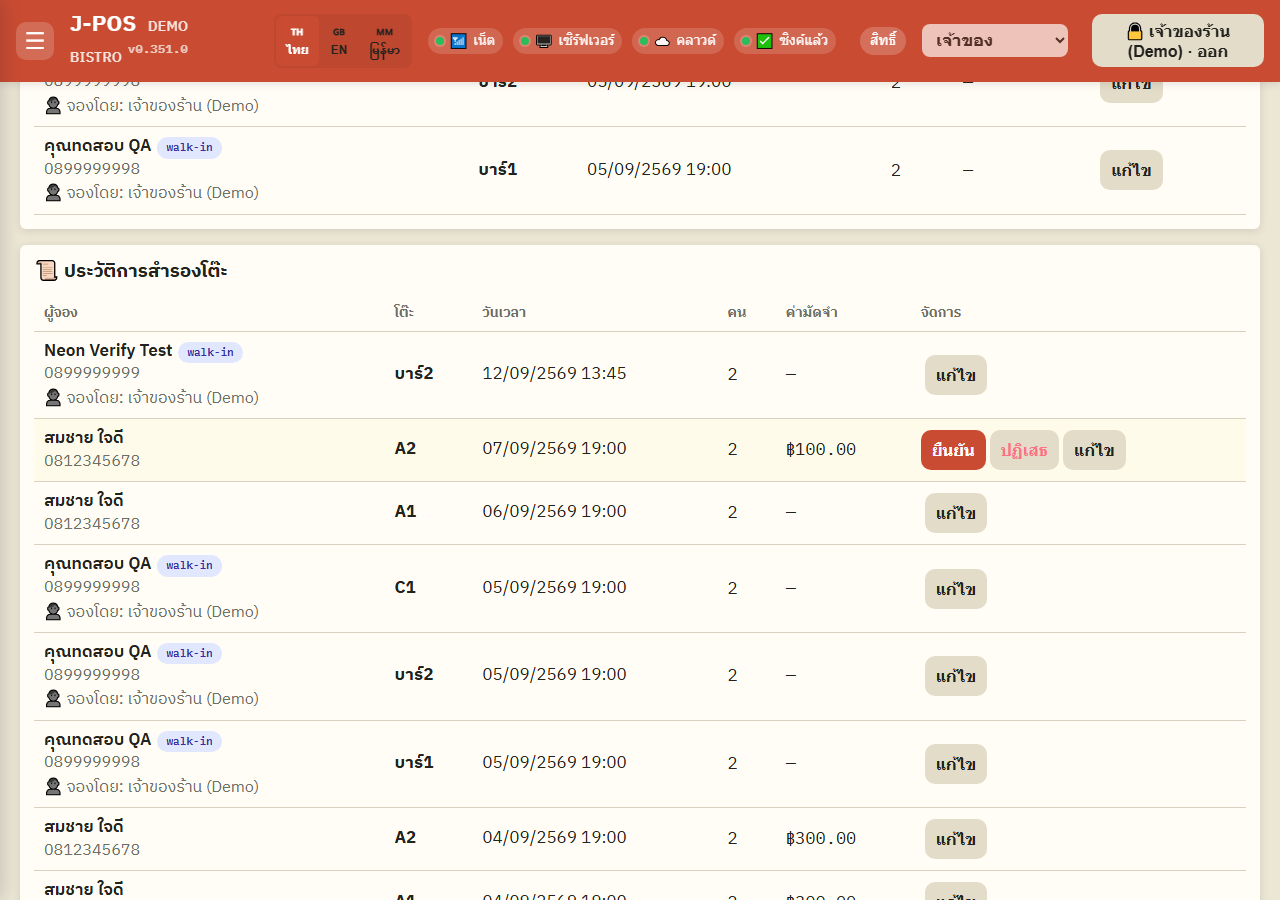
The “Manage” tab only shows “Confirm”/“Reject” buttons on bookings still in “awaiting deposit” status — a normal booking with no deposit auto-confirms the instant the customer submits it, with no staff action needed.
Press “Confirm” to accept an awaiting-deposit booking, or “Reject” to release the table back to available. The system always asks for confirmation before rejecting.
A booking whose customer already sent a slip carries the badge “📎 ได้รับสลิปแล้ว — รอเจ้าหน้าที่ตรวจ” (slip received — awaiting staff check) with the time it was sent, plus a “ดูสลิป” (View slip) link when the image was stored. It waits for staff to check it and confirm or reject — it doesn't cancel itself when the hold time runs out. A booking with no slip still cancels itself at the end of the hold time.
Open full size Book on a customer's behalf (walk-in)
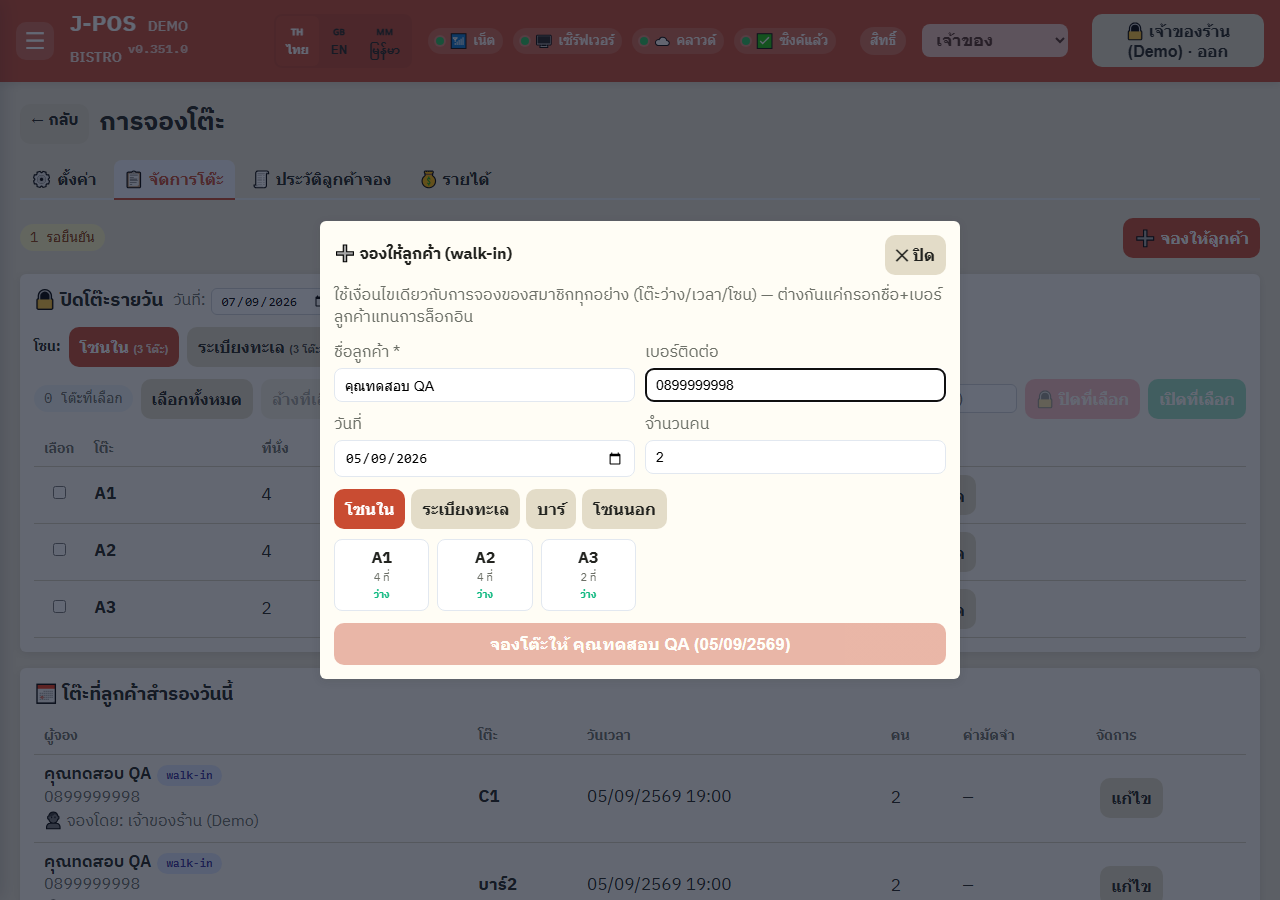
On the same tab, press “Book for customer” to record a booking for someone who called or walked in, without going through LINE.
Open full size Close specific tables for a date (Table Closure)
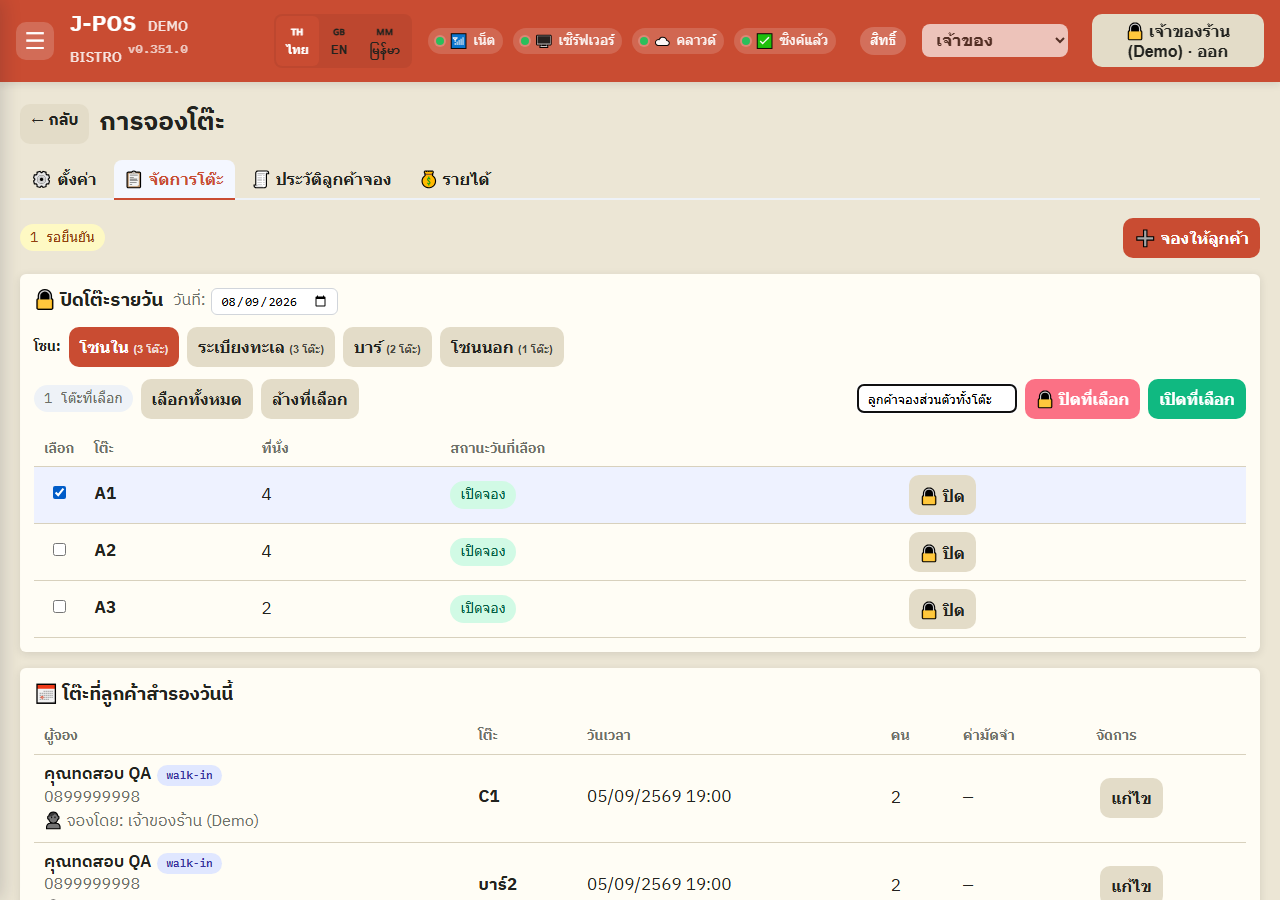
Pick a zone and date, check the tables to close for that specific day — e.g. a private full-table booking, or a broken table.
Enter a reason, then apply it to every selected table at once in a single click.
Open full size Check customers in at the shop
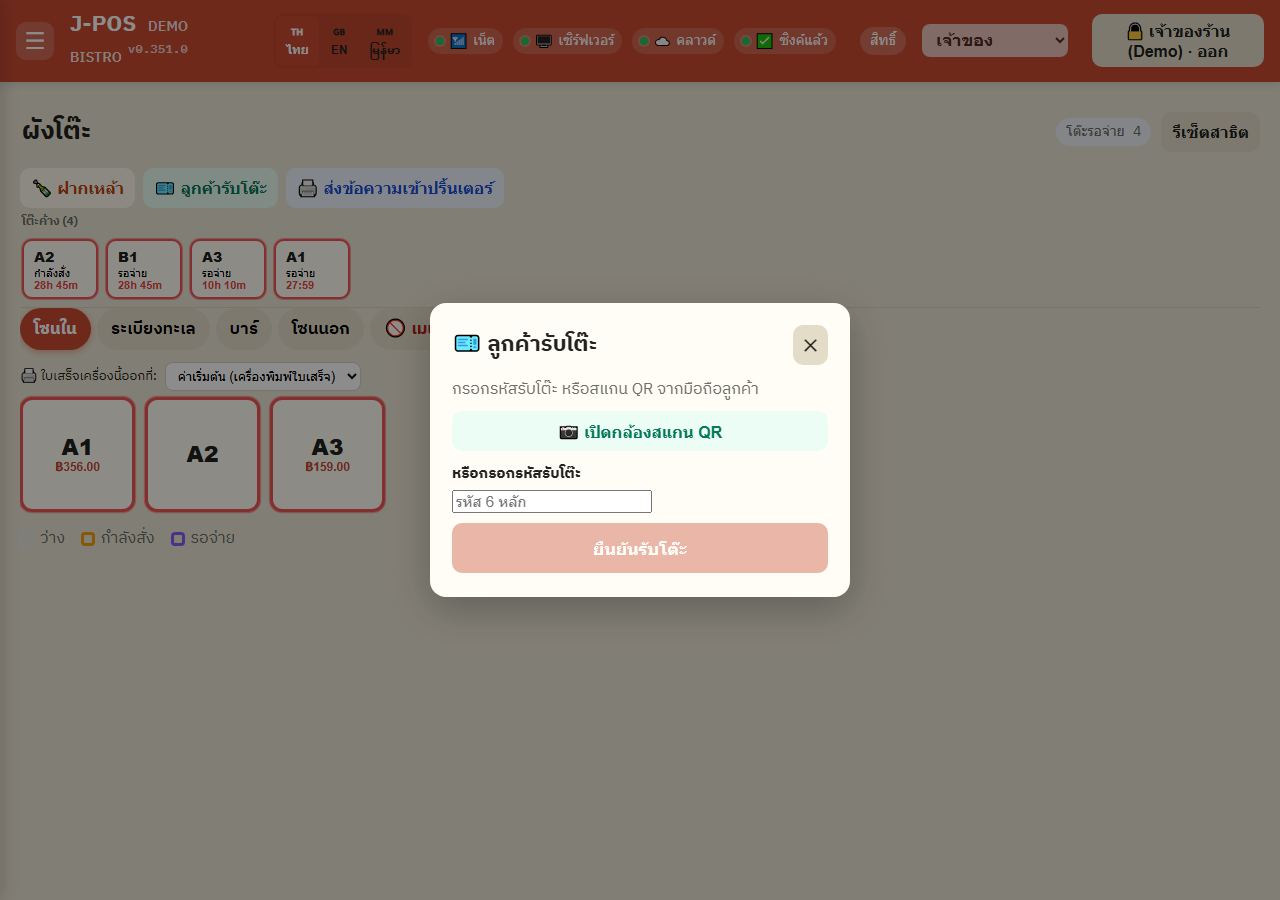
Check-in is for bookings staff make: after “Book for customer”, the system shows a 6-digit code. When the customer arrives, tap “🎫 Table check-in” on the POS floor screen and type or scan that code. (LINE bookings give the customer no code.)
The booking status changes to “checked in” — only reservations already in “confirmed” status can be checked in.
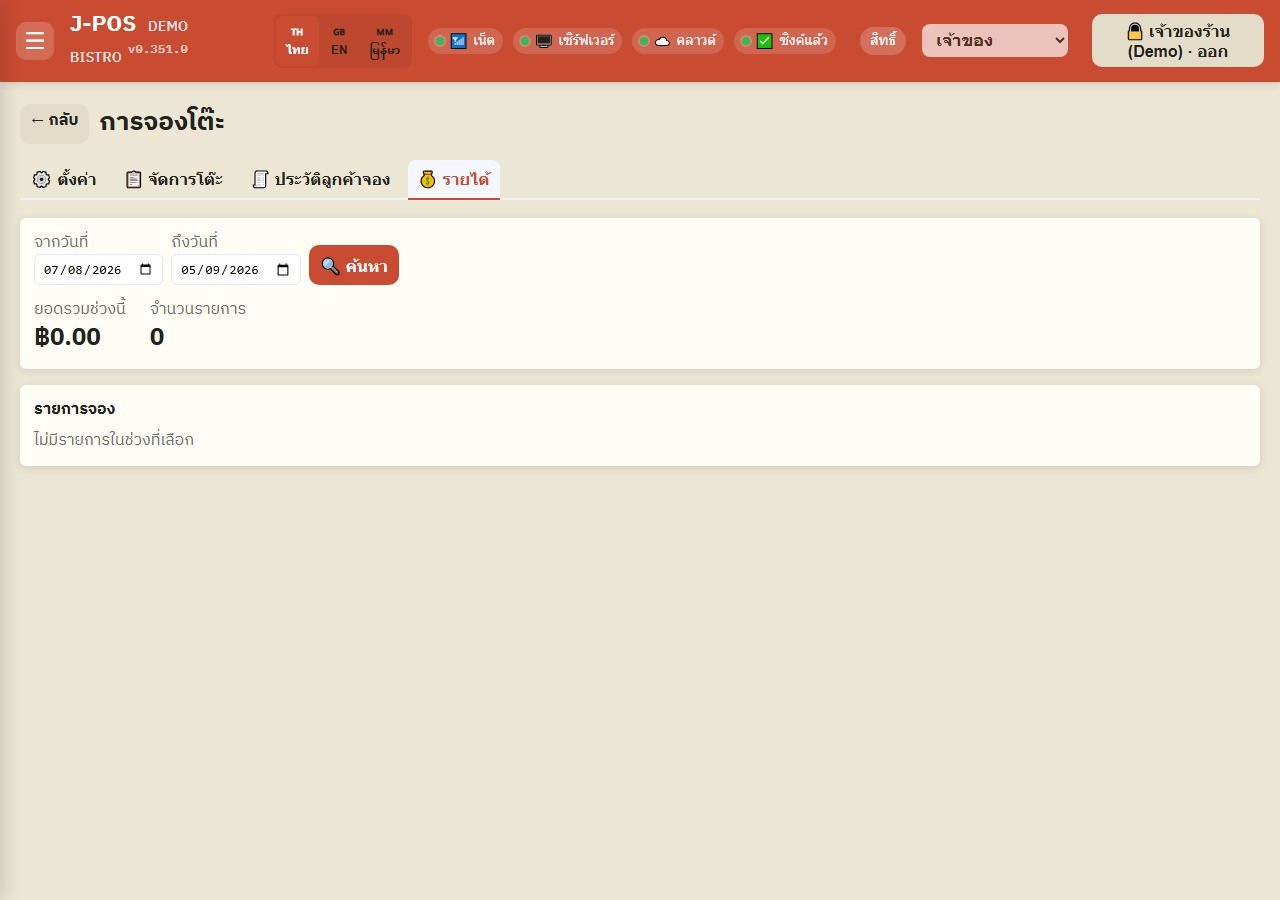
Open full size Review reservation revenue
The “Revenue” tab summarizes reservation-fee/deposit revenue collected over a given period.
Open full size
Common points of confusion
A Special Day doesn't close tables — it only sets pricing
Marking a date as a Special Day only affects pricing/reservation fees. A table with no fee override on that day is still a normal, freely bookable table — Special Days never restrict who can see or book a table.
Some zones only accept bookings on certain weekdays
If a zone is restricted to specific weekdays (e.g. Friday–Saturday only), a customer picking a different day sees a warning and can't book that zone on that day — they need to pick another day or zone.
Table availability auto-refreshes every 30 seconds
The customer booking page rechecks booked/closed tables every 30 seconds, and immediately when the tab regains focus — a table someone else just booked or closed shows as unavailable without needing a manual page refresh.