BOOK 01/25Front of house & tables
Floor plan
Set up your floor plan (zones + tables) and track live table status during service — configure it on the Floor management page, then use it day-to-day on the main table screen.
Set up the floor plan (zones + tables)
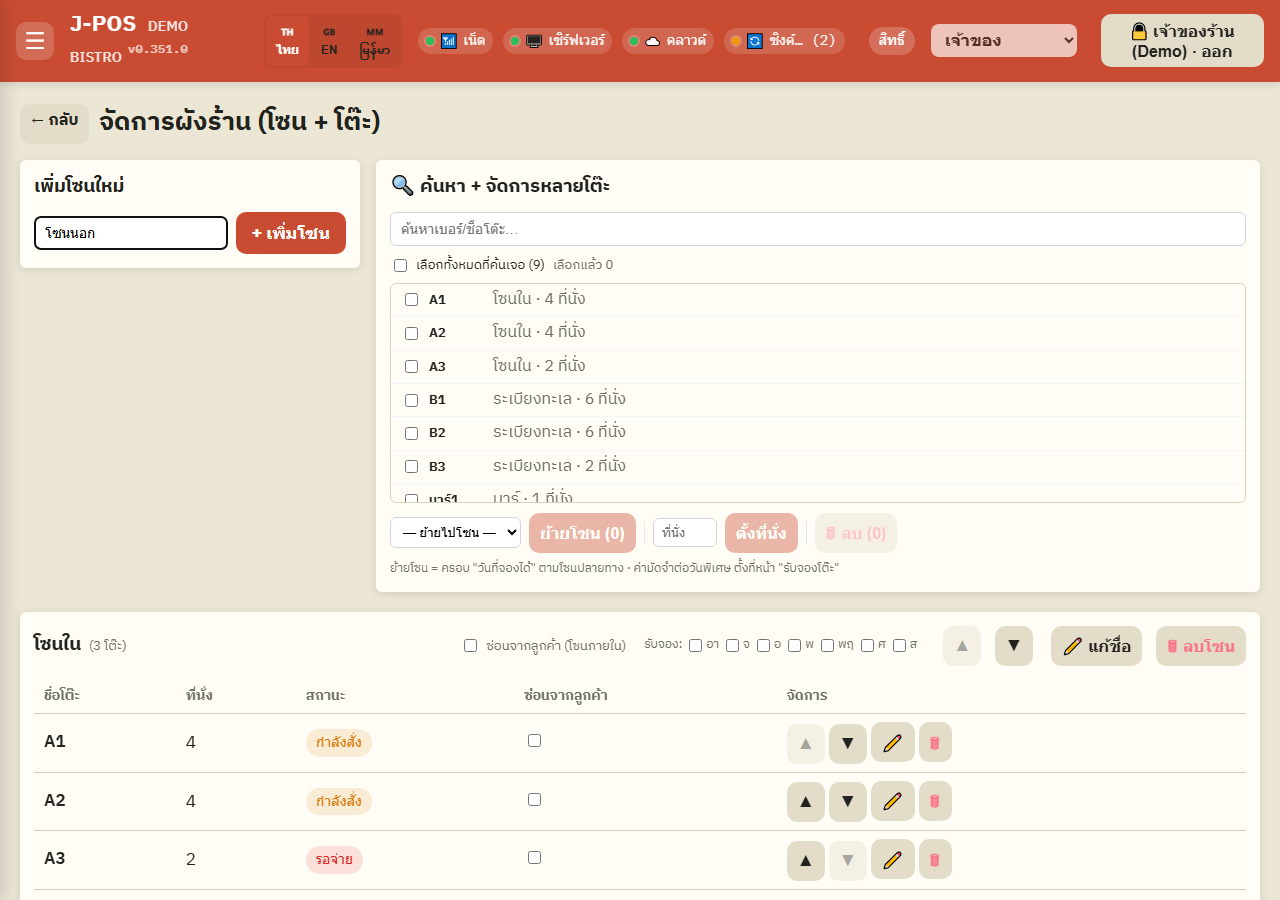
Add a new zone
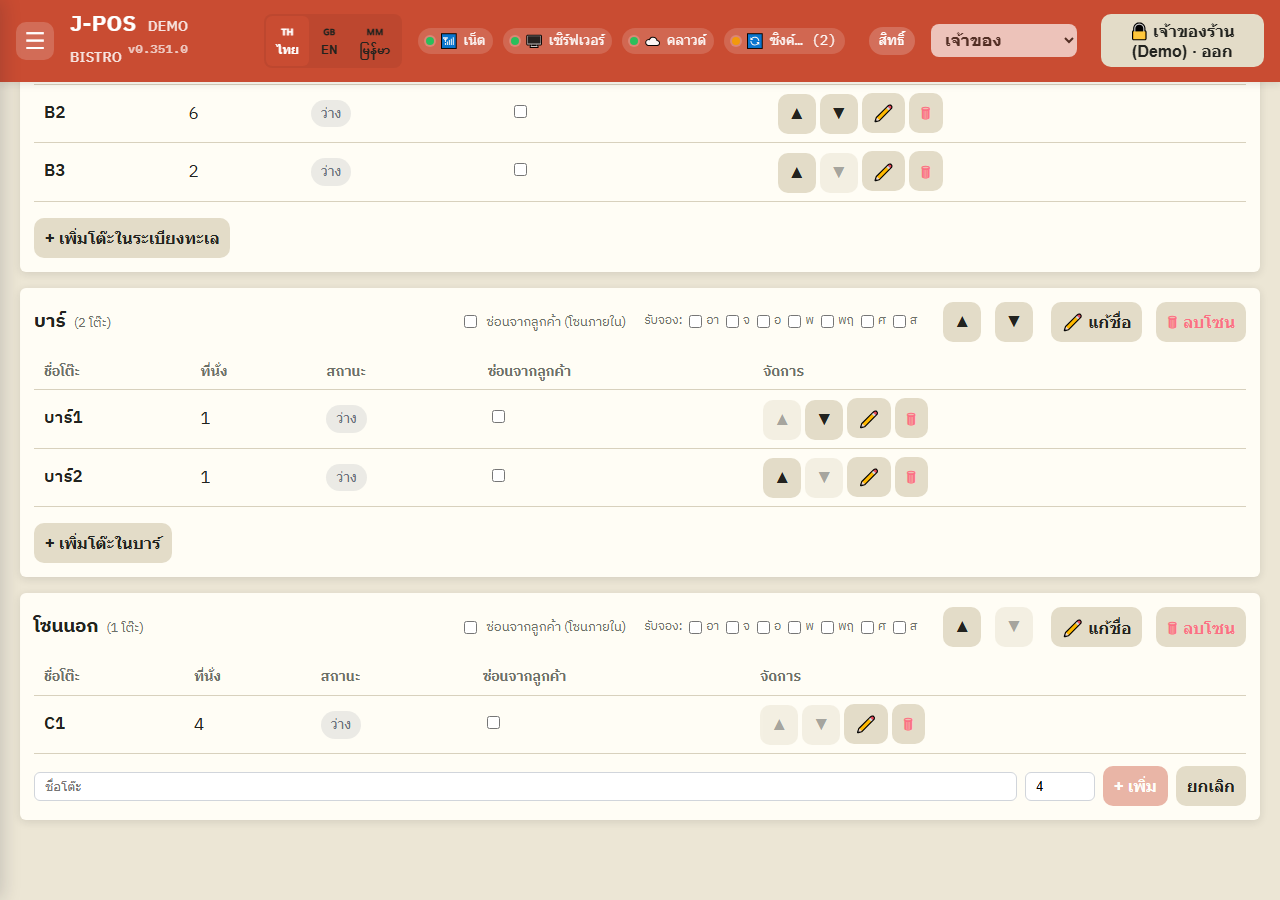
Open the Floor management page, type a zone name (e.g. Outdoor) into the “Add zone” field, and press “+ Add zone”.
Open full size Add tables to a zone
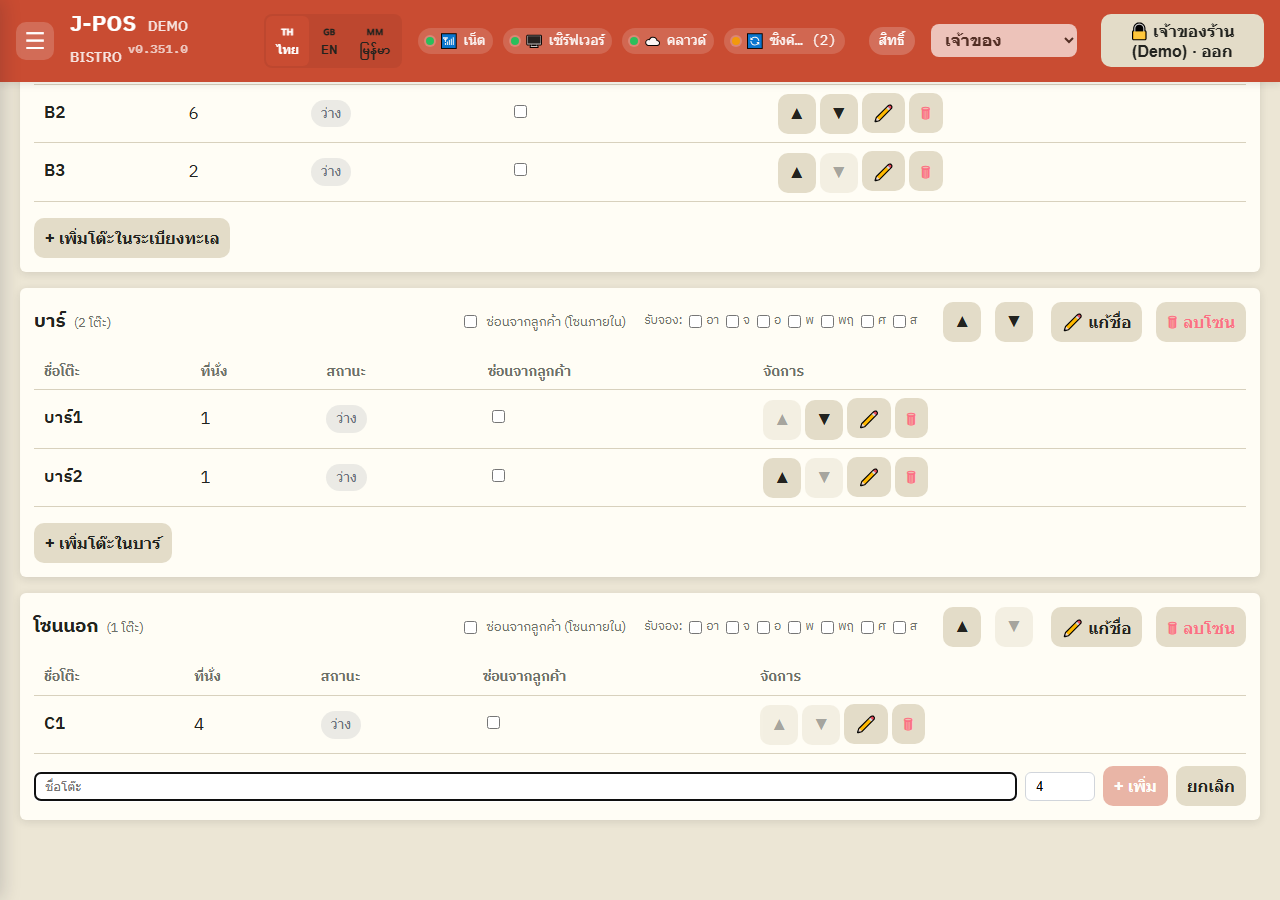
Under a zone's table list, press “+ Add table to <zone>”, enter the table name and seat count (default 4, max 20), then press “+ Add”.
Open full size Edit / reorder zones and tables
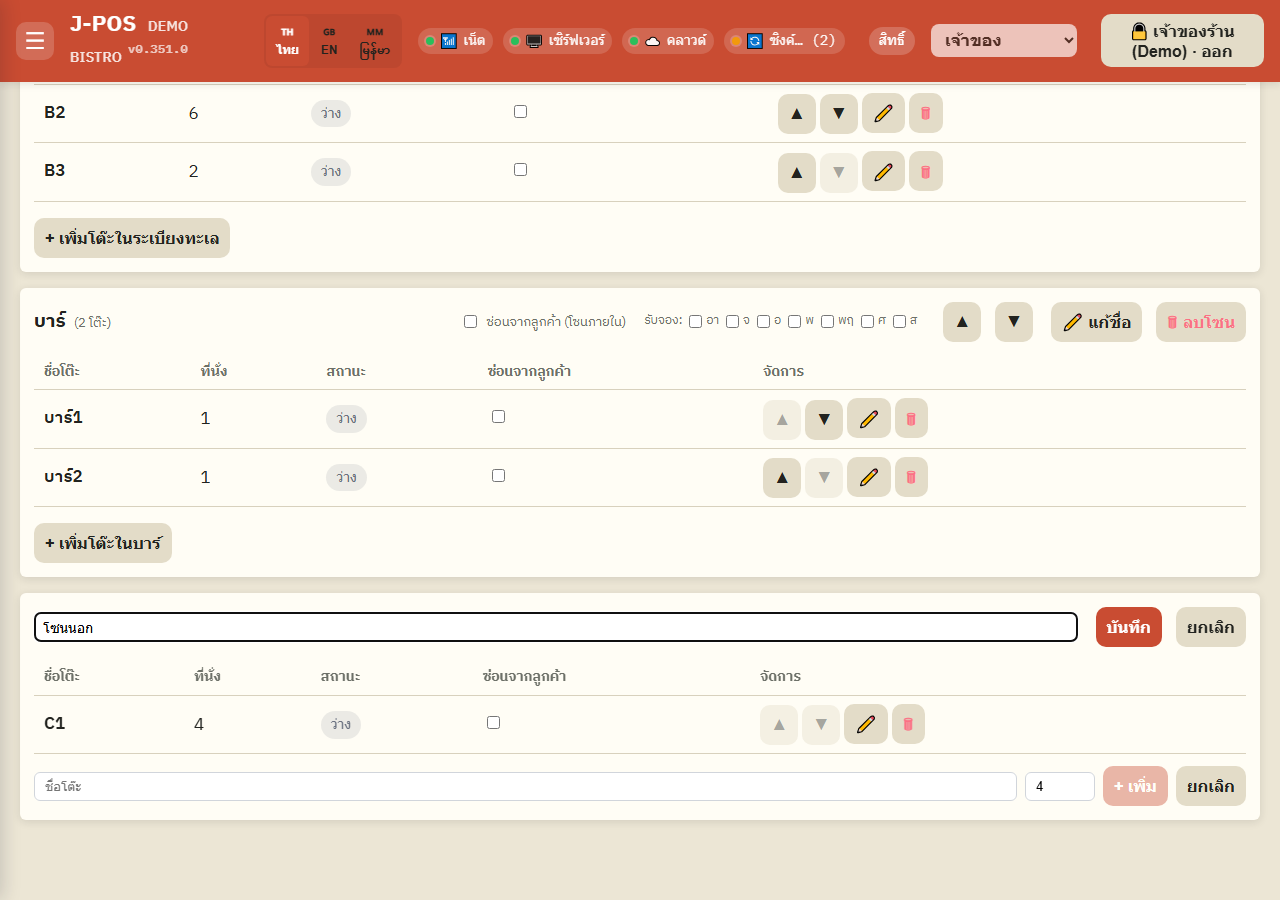
Press ✏️ to rename a zone or table, the ▲ ▼ buttons to change display order, and 🗑 to delete.
Deleting a zone deletes every table inside it too — the system always asks you to confirm first.
Open full size Search + manage multiple tables at once
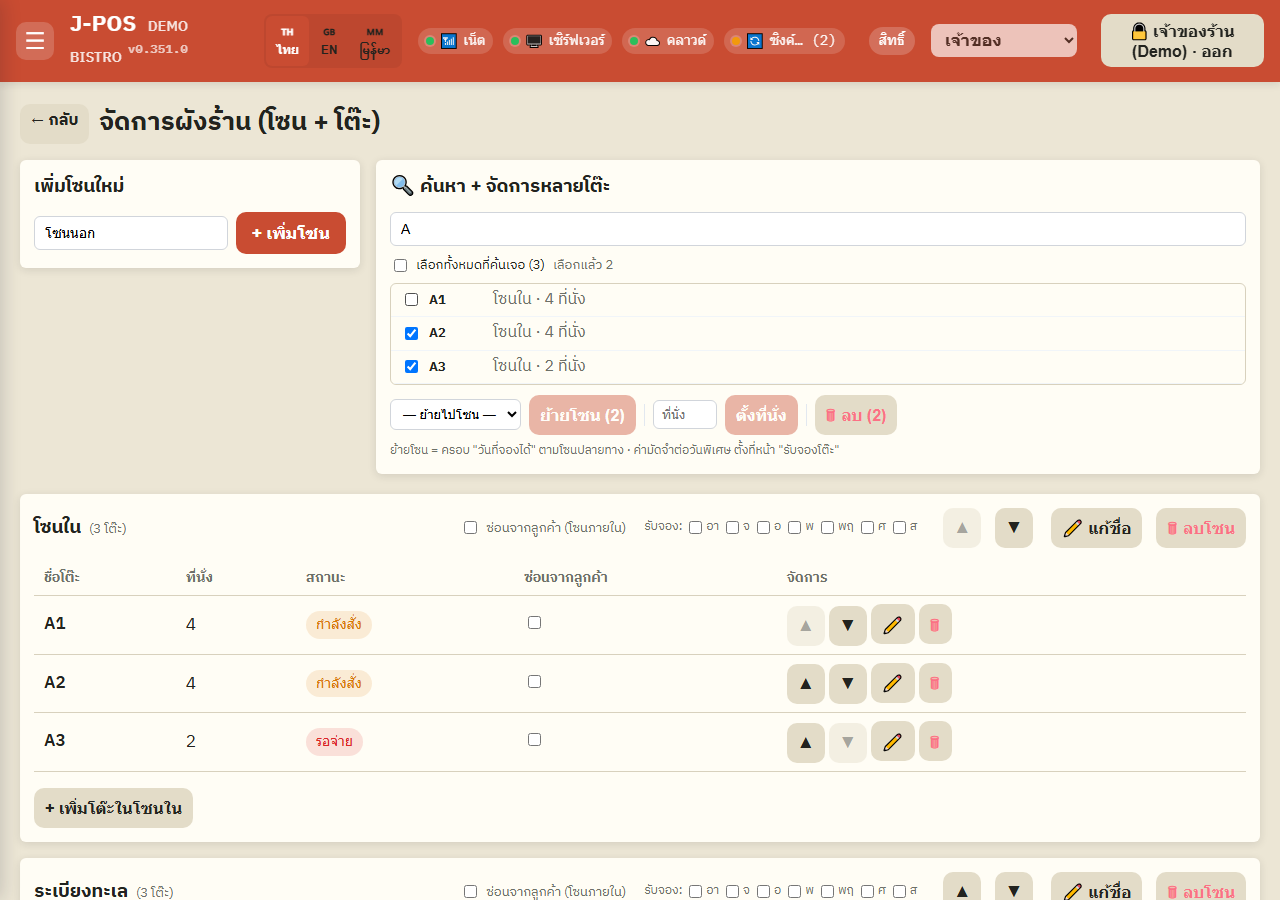
Use the “Search + manage multiple tables” box to search by table name/number and select several at once.
From there you can move all of them to another zone, set the same seat count for every selected table, or delete them all in one click.
Open full size Hide a table or zone from customers
Check “Hide from customers” at the zone level for back-of-house zones (kitchen, staff area) or at the individual table level.
Hiding only affects the customer's online reservation page — staff still see and use the table normally on the POS.
You can also restrict a zone to only accept reservations on certain weekdays, e.g. Fri–Sat only.
Open full size
Day-to-day use (main table screen)
Read table status from the card border color
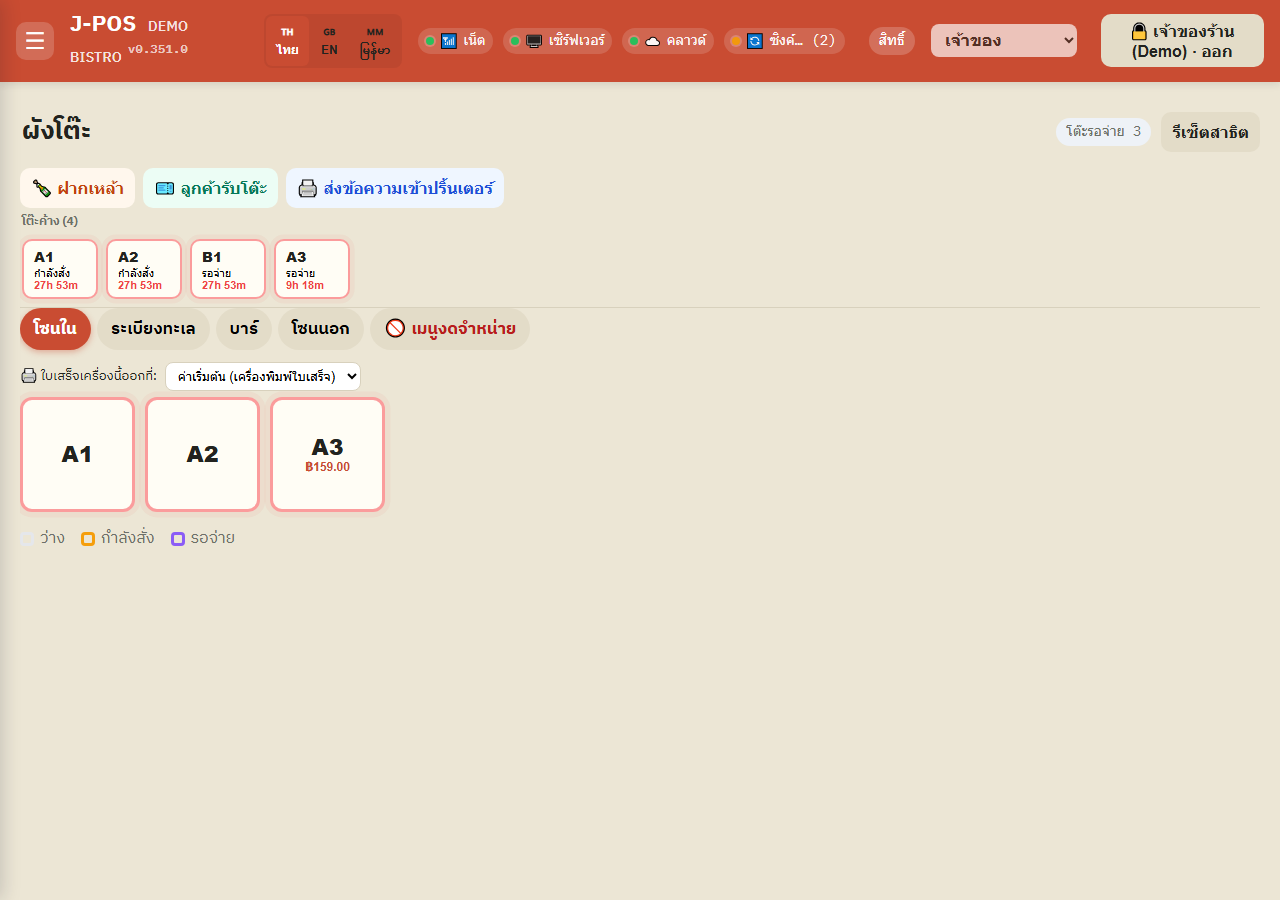
The main table screen shows each table as a square card — grey border = empty, orange = ordering, violet = bill pending (outstanding amount shown under the table number).
A card blinking red means that table has been active longer than the shop's set limit (10 minutes by default, counted from its bill/first order) — worth checking.
Open full size Tap a table to open its menu
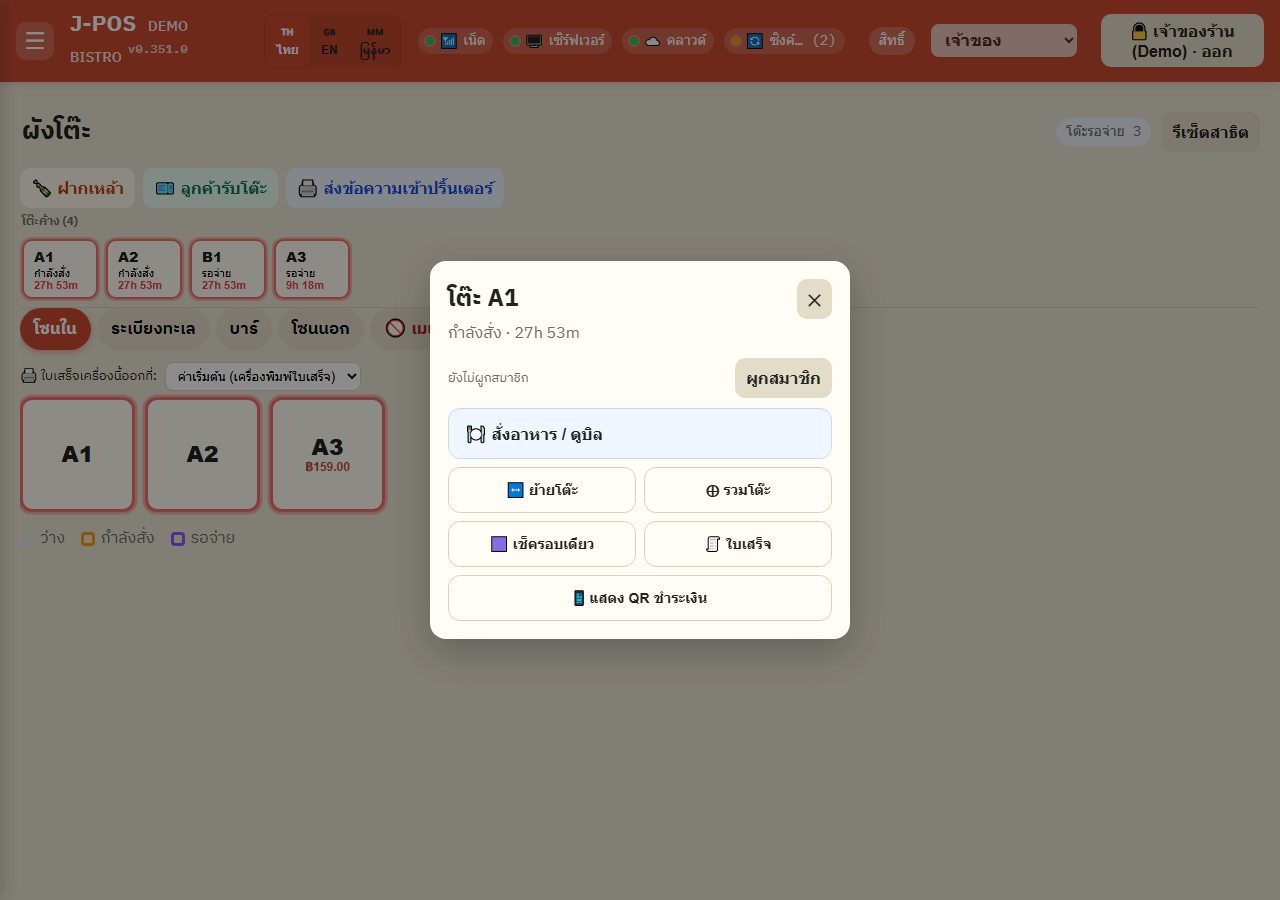
Tapping a table card opens a popup for that table. Press “Order / Bill” to go straight into that table's ordering screen.
Open full size Move a table / merge tables
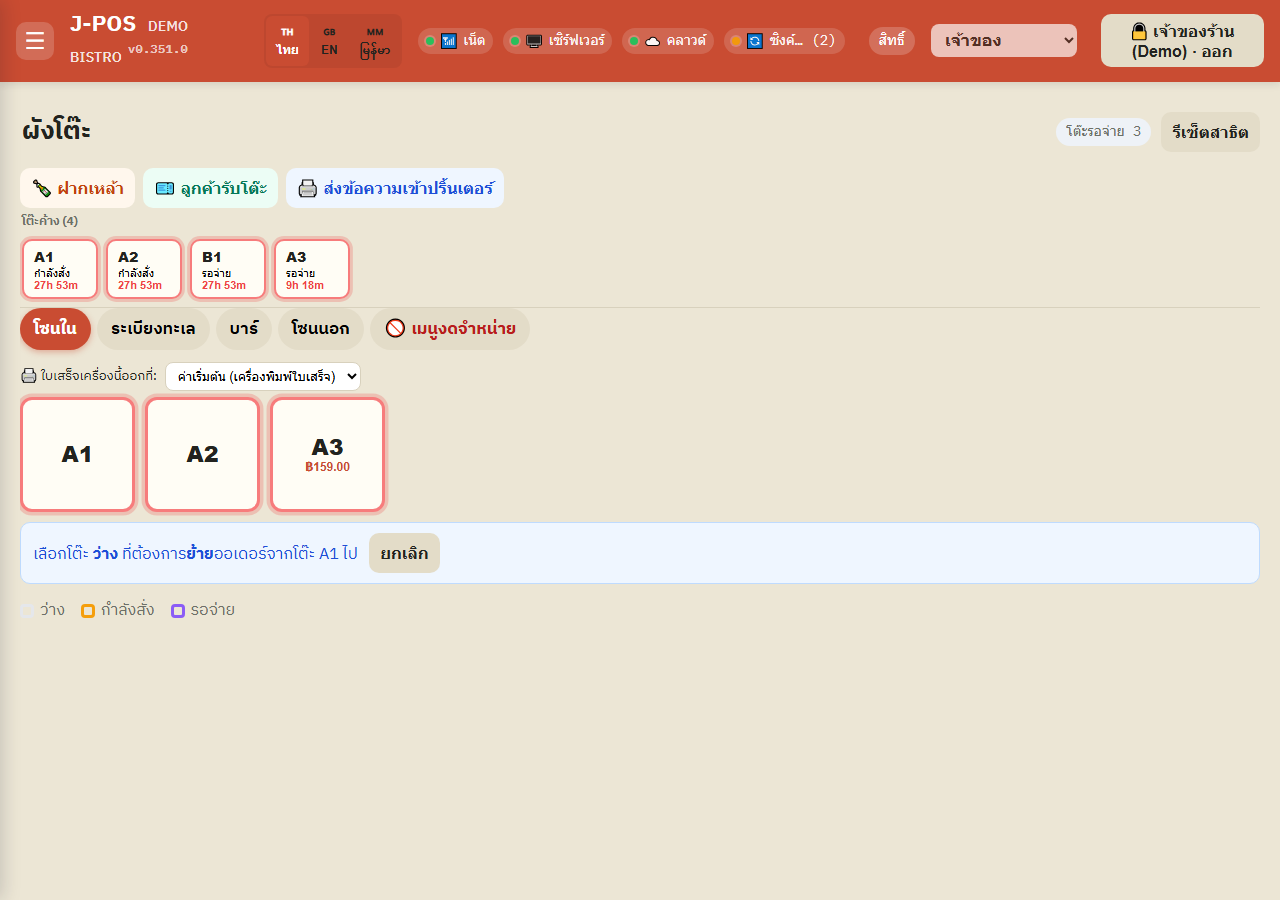
In the popup, press “Move” then tap an empty target table to move the whole order over.
Or press “Merge” then tap another table that already has an order, to combine both orders into one.
Open full size Turn on “Single check”
The “Single check” button in the popup marks a table where the customer asked to close out in one go — it is only a marker for staff; it does not block adding more items.
Turning it on always requires an authorized PIN.
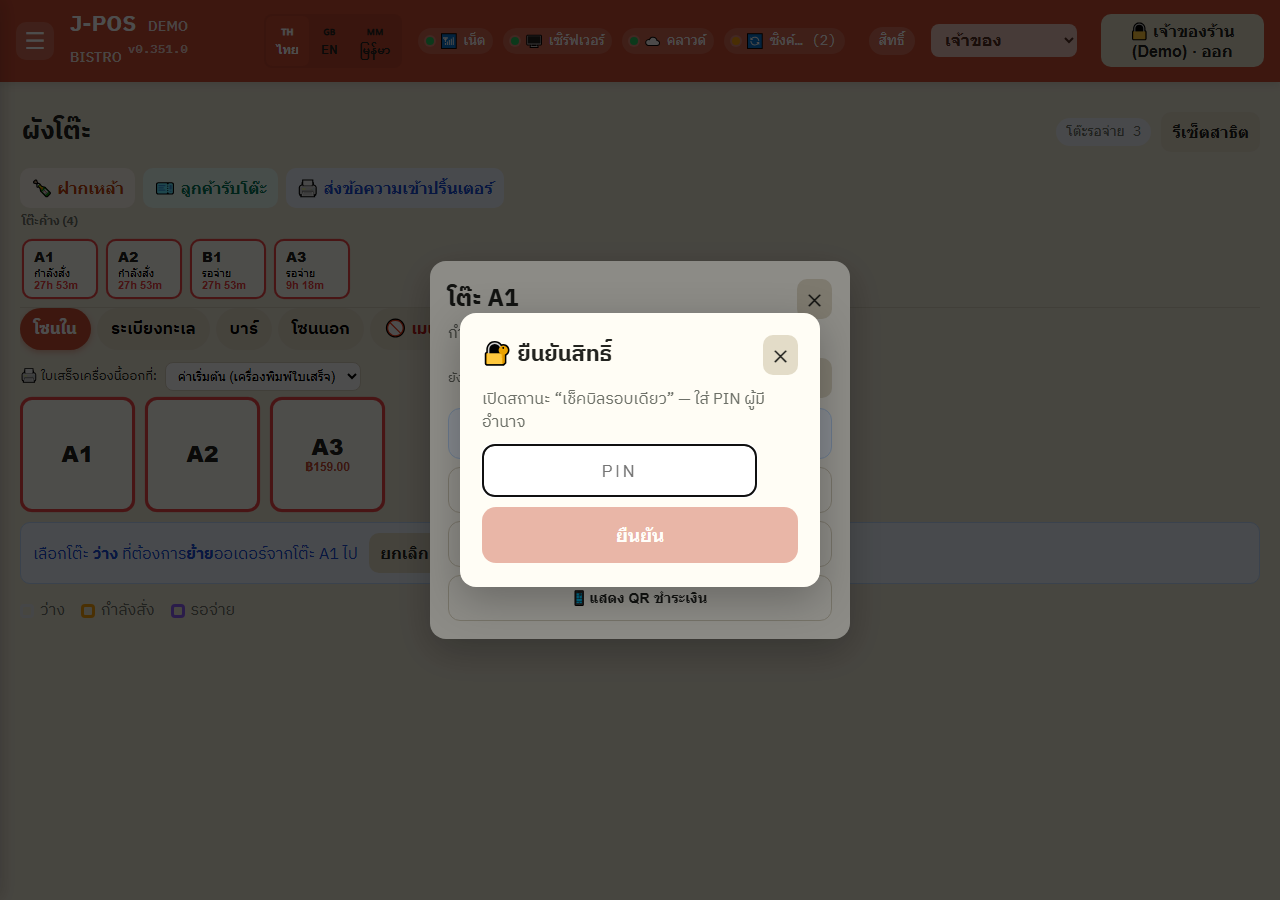
Open full size
Common points of confusion
Three separate hide/close mechanisms — not interchangeable
Zone-level “Hide from customers”, table-level “Hide from customers”, and per-date “Table closure” (set on the Manage tab of the Reservations menu) are three separate mechanisms. They can be combined, but none of them substitutes for another — closing the wrong one can leave a table bookable when you meant to close it.
Automatic order-key lock
If the shop turns this on (it is off by default), once the set time has passed since the table's first send to the kitchen, the system locks it from taking new order items. An authorized PIN is required to unlock before adding more.
Another staff member already has this table open
A 👤 name badge in the bottom-right corner of a table card means another staff member currently has that table's popup open — check before editing at the same time.