BOOK 06/25Bills & payments
Billing / history
Open a table's bill, take payment (cash / PromptPay / card), split bills, and look back, reprint, or refund past bills from Bill History.
Open a bill / take payment
Open a table's bill screen
From the table popup, press “Order / Bill”, then press “Bill →” on the ordering screen to go to that table's bill page.
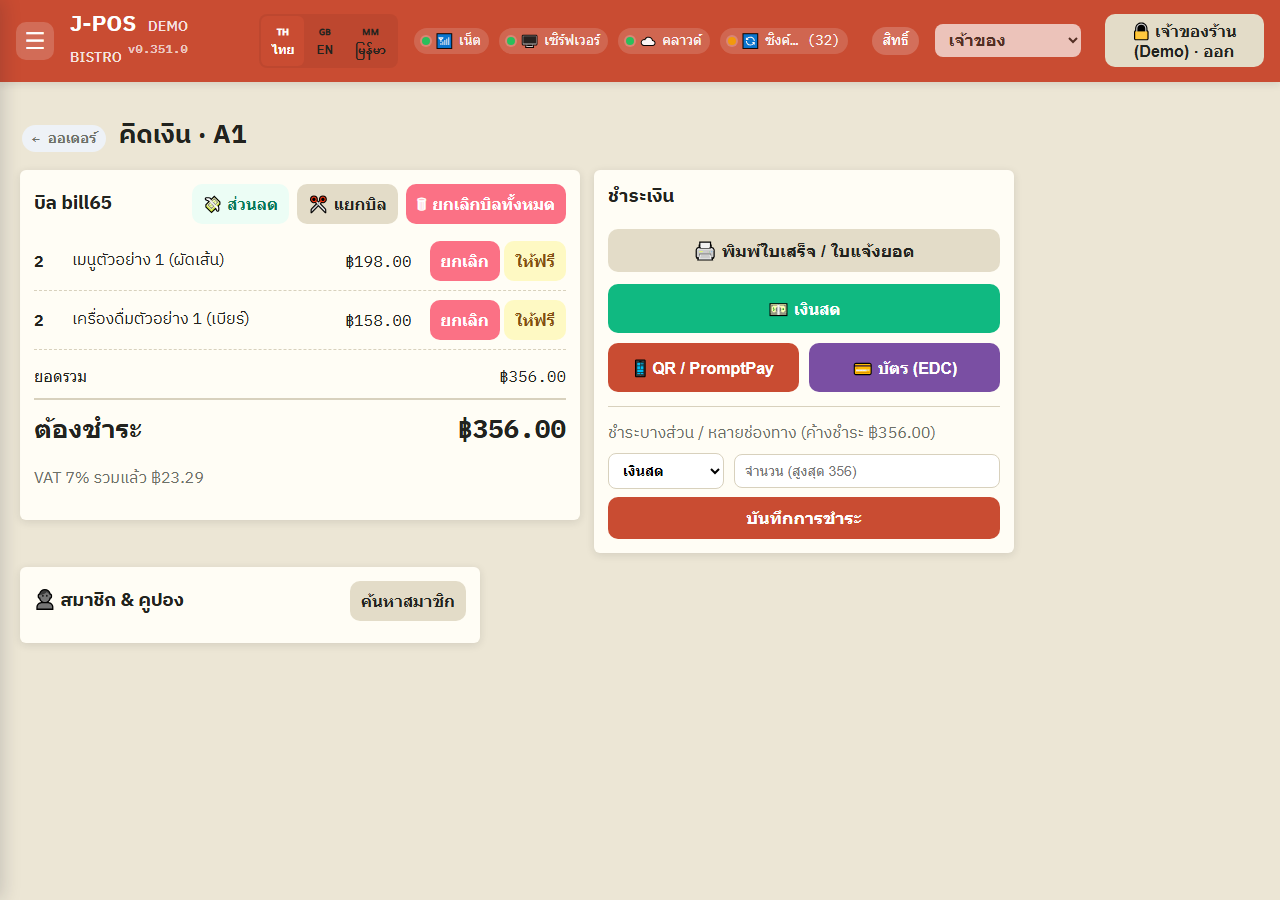
Open full size Apply a discount (if any)
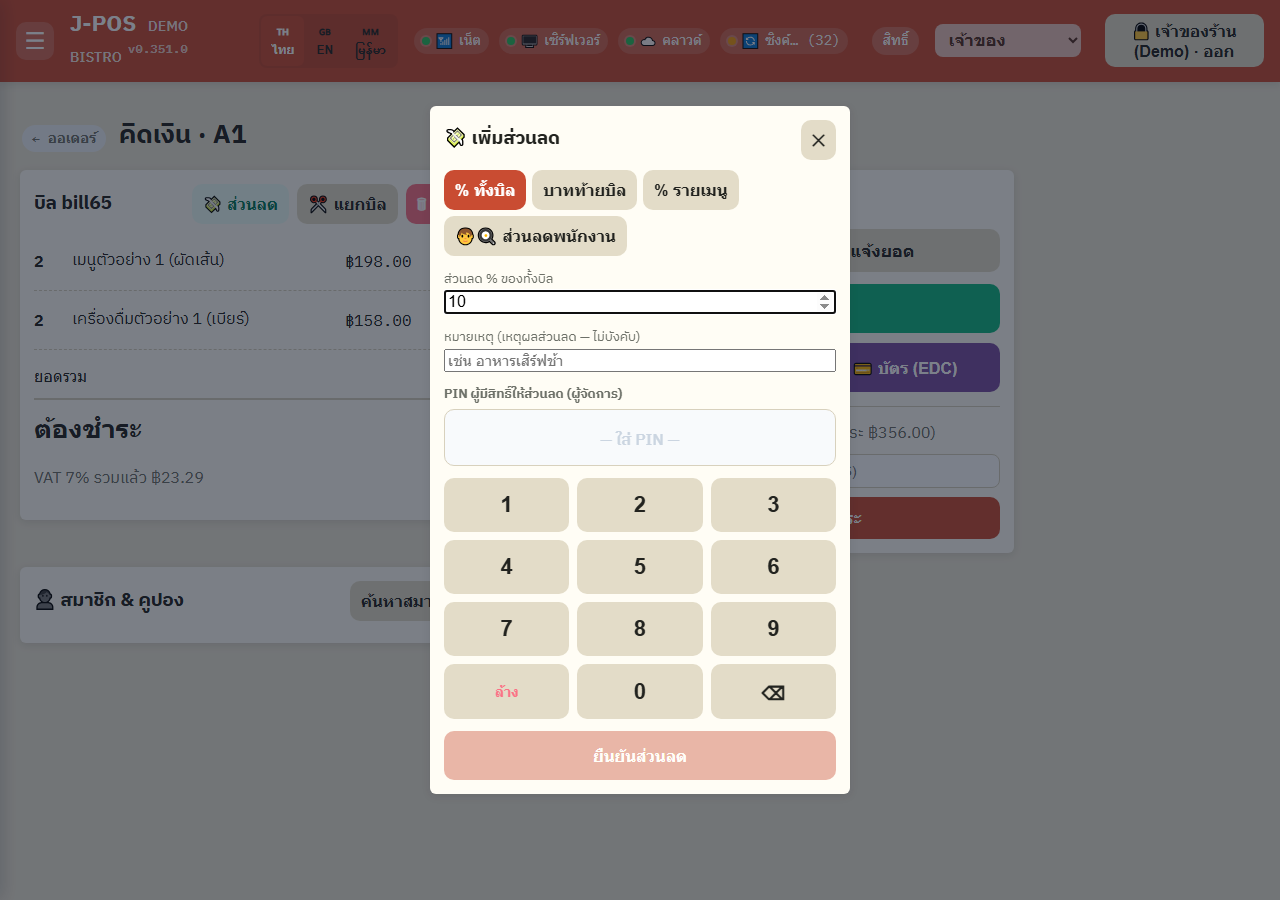
Press the “Discount” button and enter an amount or percentage before taking payment — a discount entered here always needs an authorized PIN (automatic promotions don't).
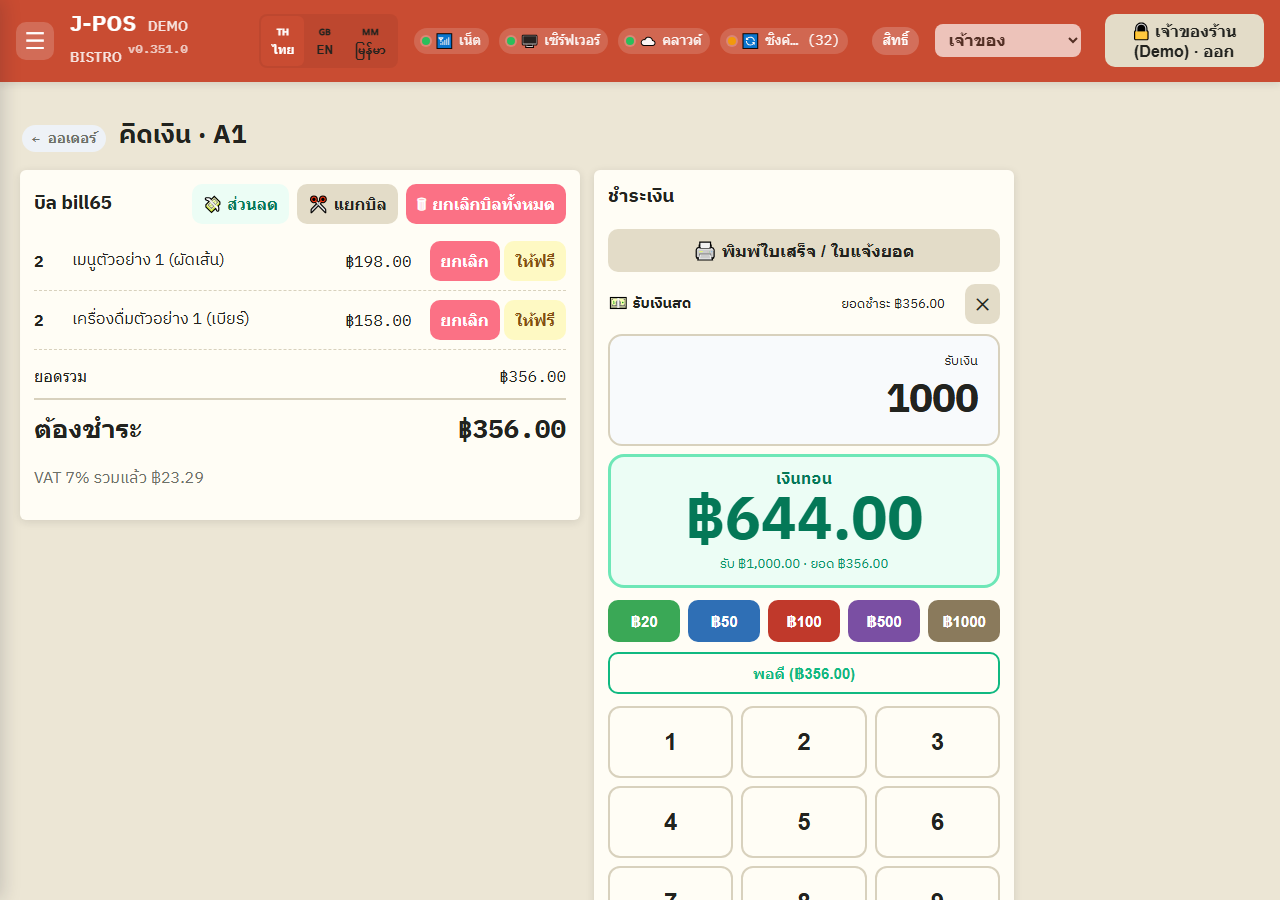
Open full size Take a cash payment
Select “Cash”, open the number pad, and enter the amount the customer handed over — change is calculated automatically.
Press “Confirm payment” to close the bill; the button stays disabled until the entered amount covers the total.
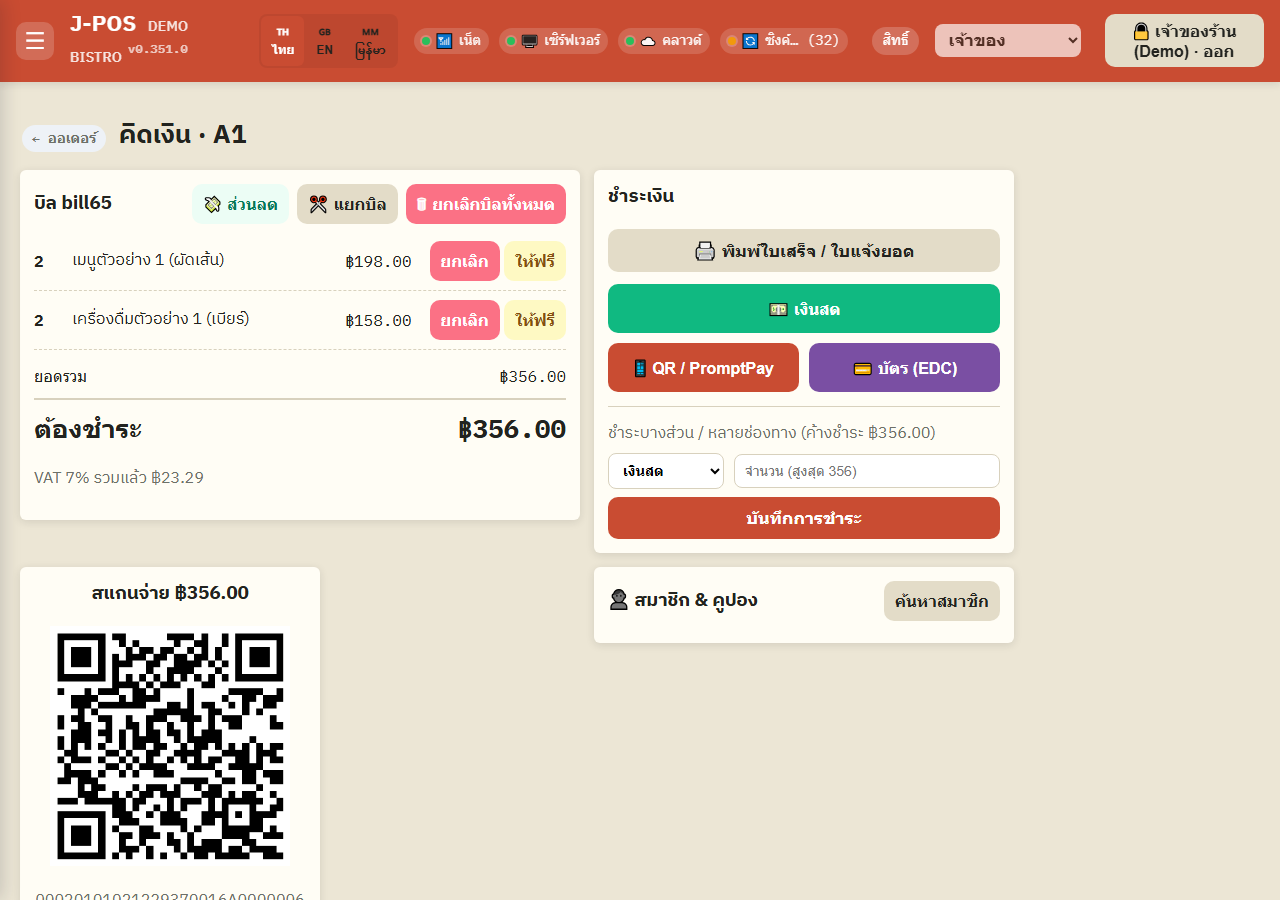
Open full size Accept PromptPay
Select PromptPay and the system generates a QR for the customer to scan and pay.
This screen has a single button, “Confirm payment manually (no automatic proof)” — use it once you've seen a transfer notification or slip yourself; there's no slip-upload button on this screen.
Pressing it closes the bill immediately, and it always requires an authorized PIN first, since there's no automatic proof the transfer happened.
Open full size Accept a card (EDC)
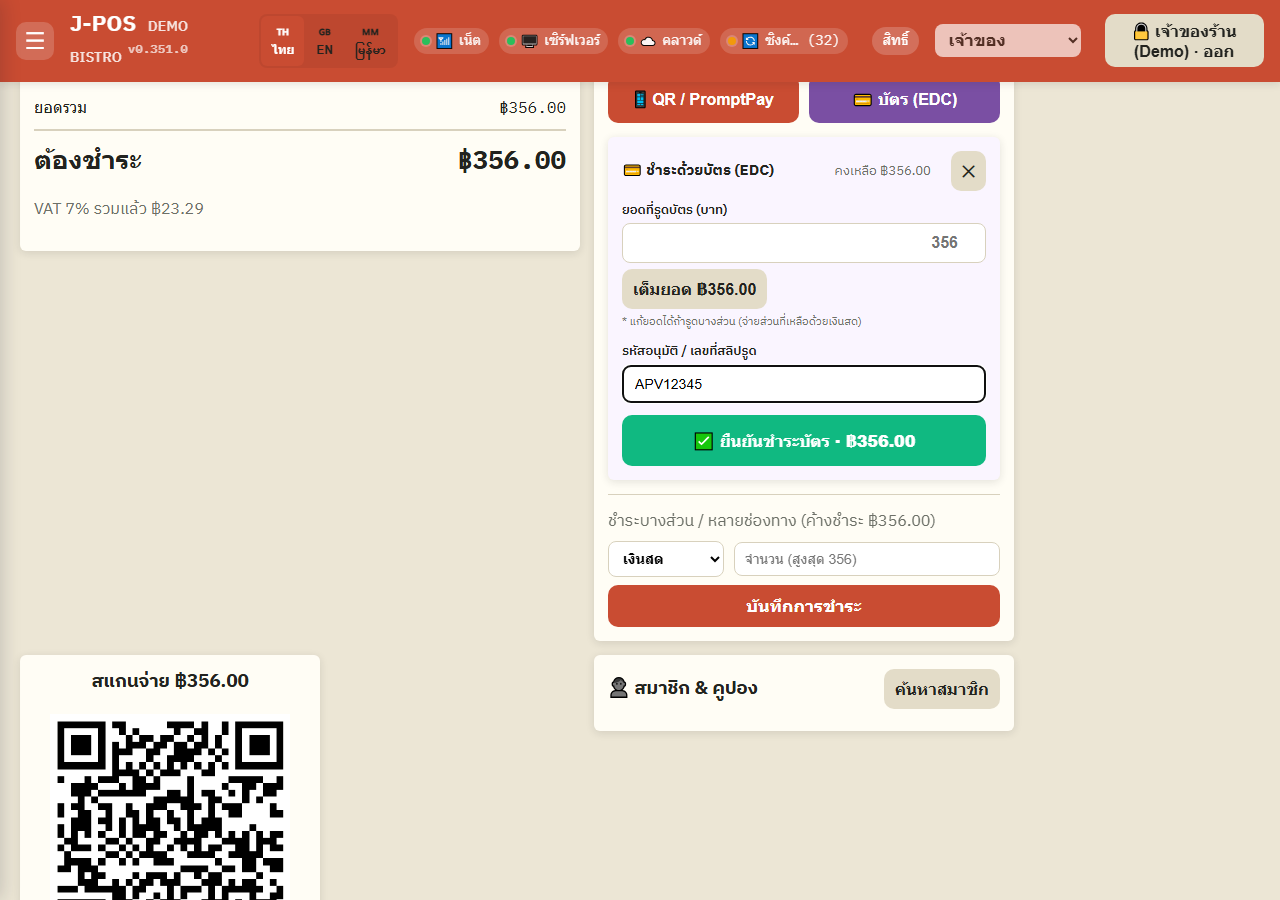
Select the card channel, then enter the “approval code / card slip number” from the card terminal before confirming — this field is required and blocks confirmation if left blank.
Open full size Partial payment / multiple methods
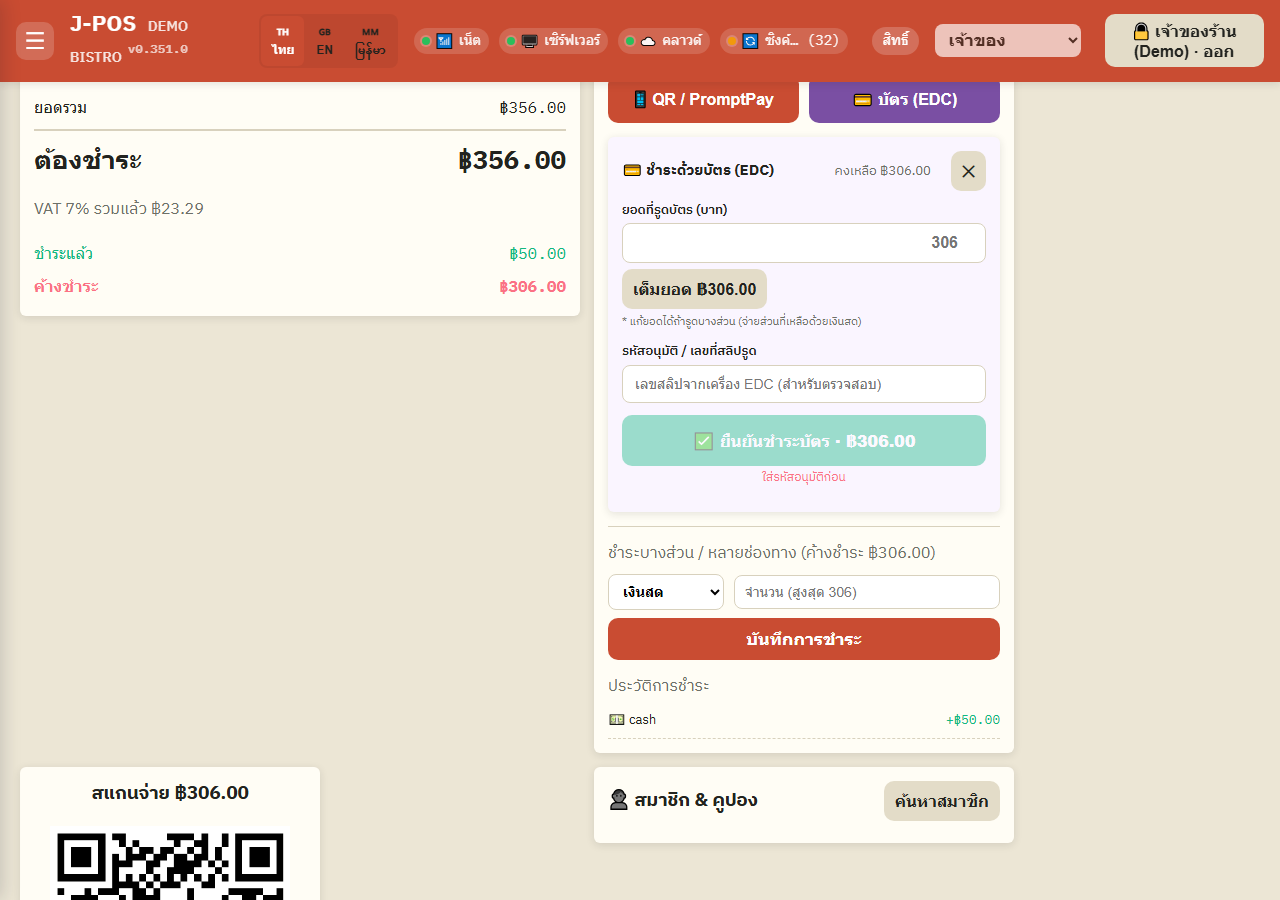
If the customer doesn't pay the full amount at once, use “Partial / multi-method payment” — pick a method and an amount, one payment at a time.
The bill keeps a “payment history” you can review until the outstanding balance reaches zero.
If you record a PromptPay/QR payment while the bill has no proof yet (no matched transfer alert, no verified slip), the system asks for the PIN of someone allowed to close without payment proof before it records the amount, and logs the approver — cash and card payments don't need this PIN.
Open full size Split the bill
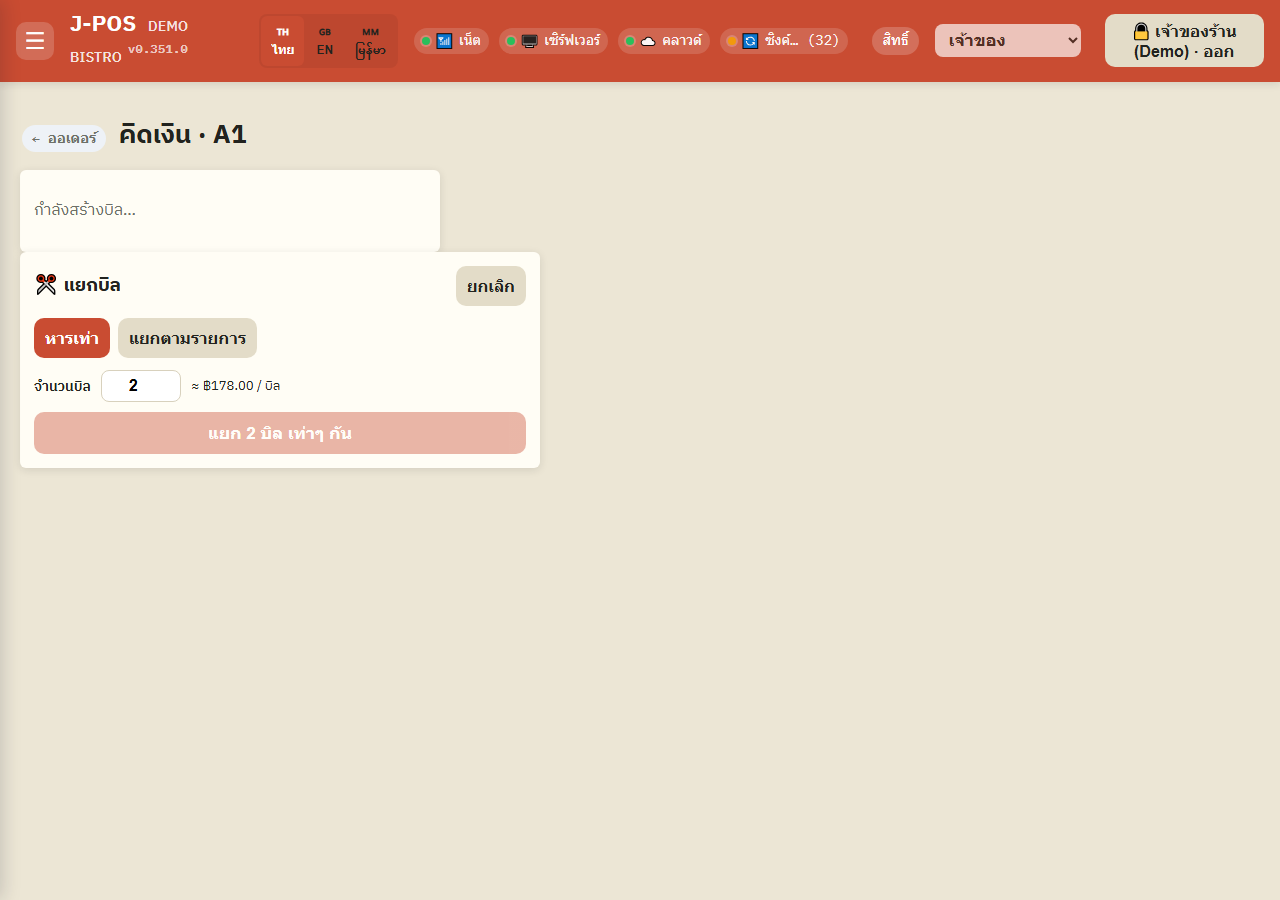
Press “Split bill” and choose a mode — “Split evenly” (set how many bills to divide into) or “Split by item” (assign each menu line to a bill number).
Splitting voids the entire original bill first, then creates the new smaller bills you configured.
A bill with a discount can't be split — remove a manual, staff or coupon discount first, then split. A bill with a promotion can't be split at all and has to close as one bill.
Open full size
Bill History
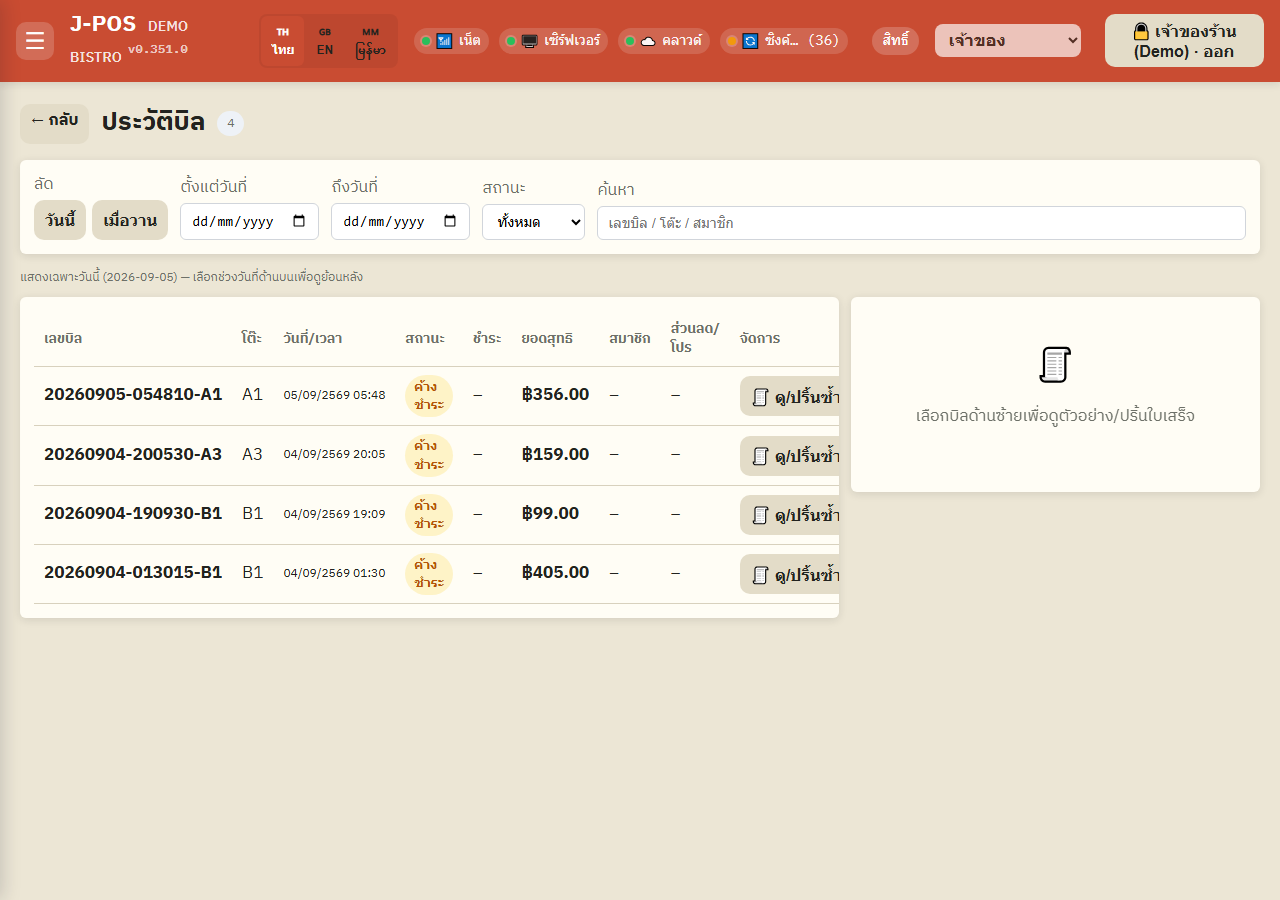
Filter and search
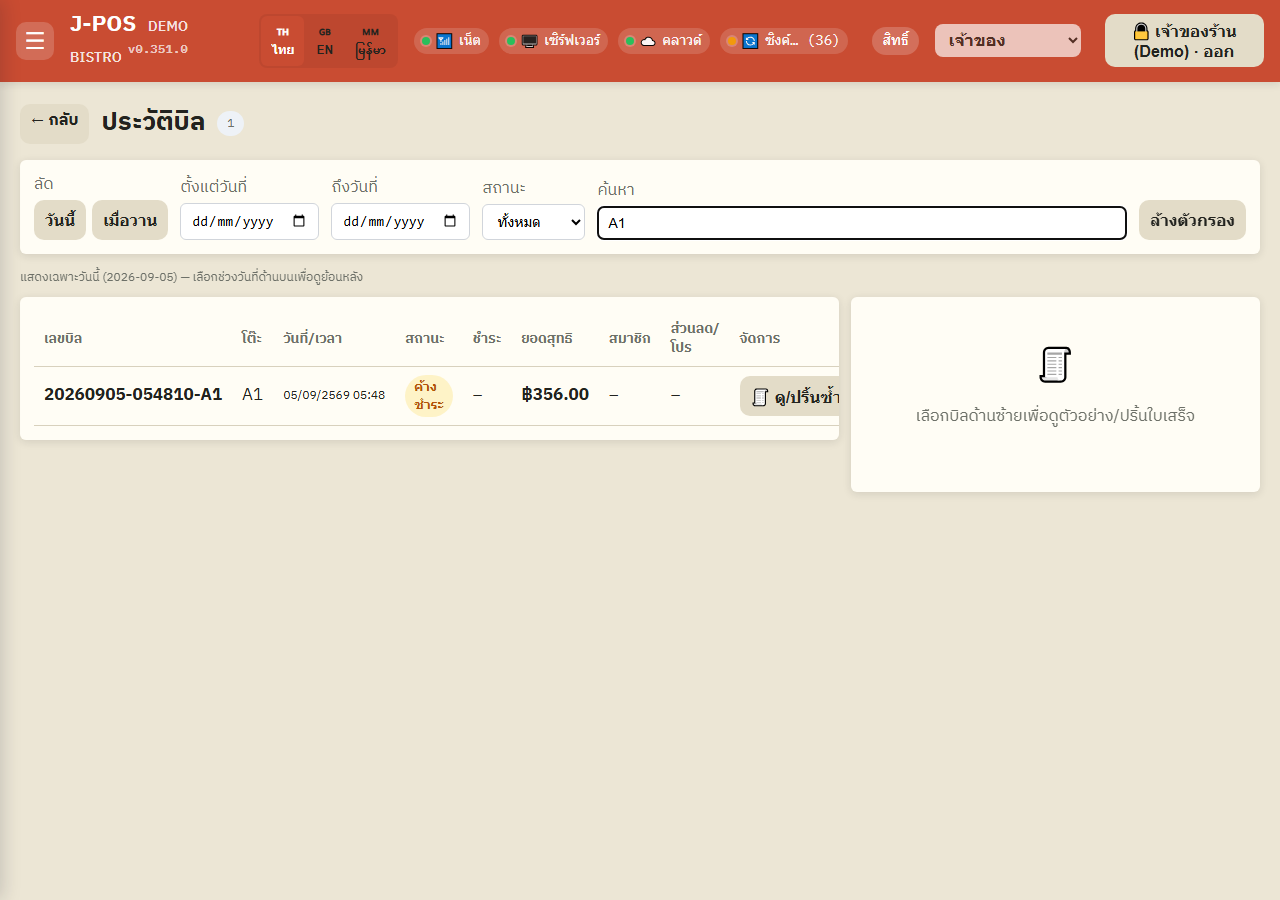
Filter by date range, bill status (paid / open / refunded), or search by text such as a bill number or customer name.
Open full size View details / reprint
Press “View / reprint” on a bill row to see the original receipt and print it again.
On a tablet or wide screen, the receipt preview shows next to the list, so reprinting several bills in a row is faster.
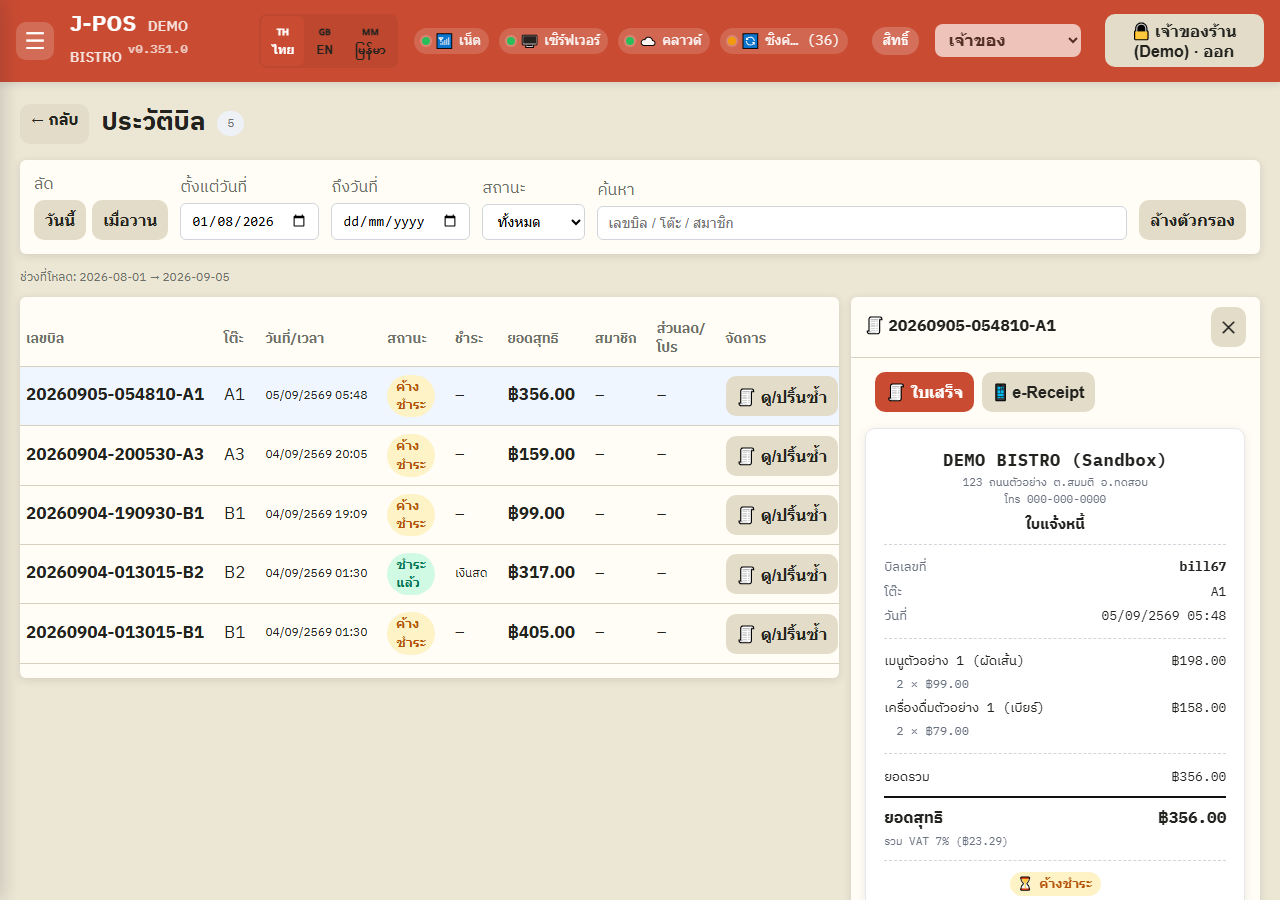
Open full size Issue a refund
Open the bill to refund and press “Refund” — the system always asks for a refund-authorized PIN first.
Pick a reason from the presets (e.g. customer cancelled the order, billed wrong/twice, wrong dish) or type your own.
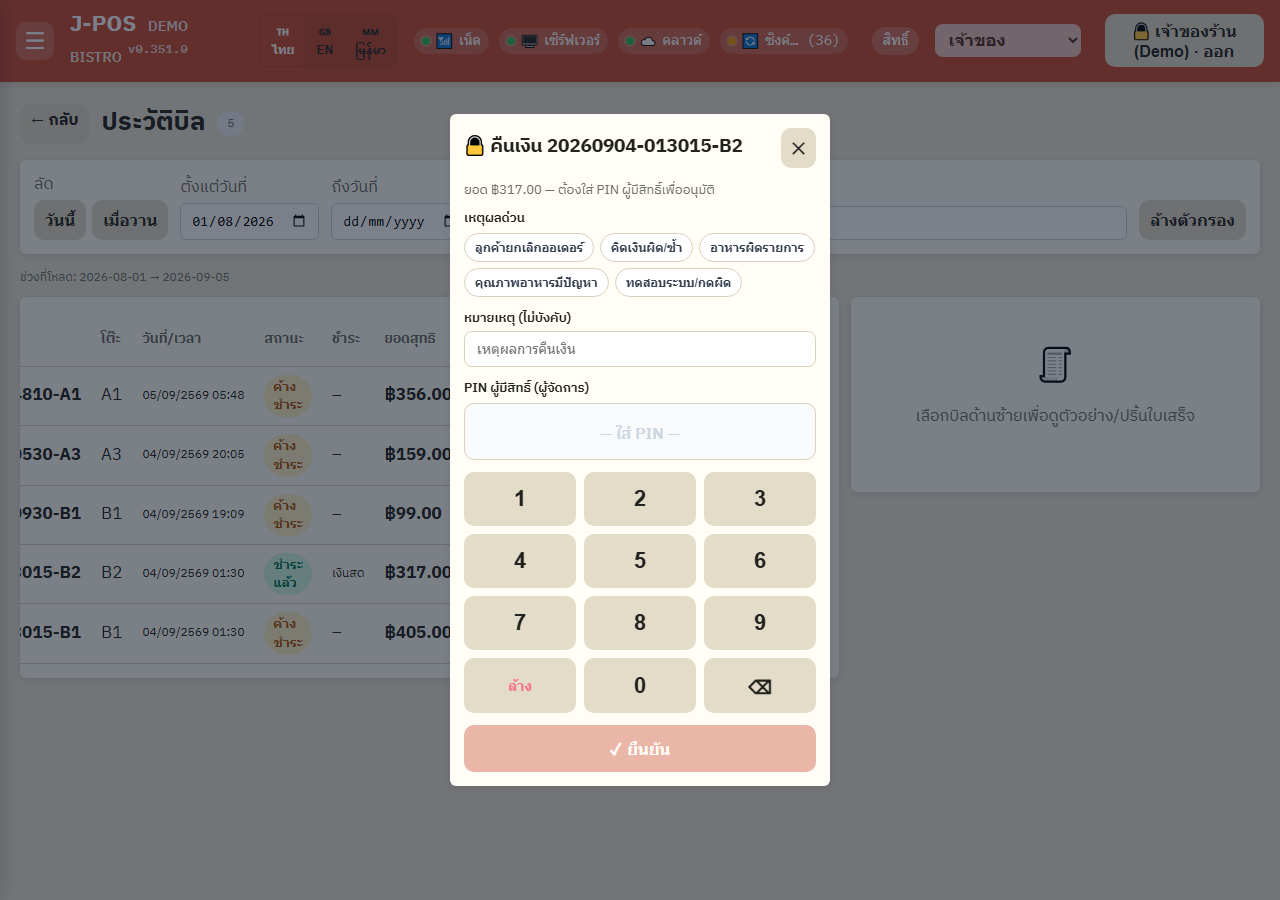
Open full size
Common points of confusion
Closing a PromptPay bill without proof always needs a PIN
Manually closing a PromptPay/QR bill without an automatic slip verification always requires an authorized PIN, because the system has no proof the transfer actually arrived.
A split bill's original can't be recovered
Splitting a bill voids the entire original bill before creating the new smaller ones. If you split by mistake you have to open a fresh bill — there's no way to get the original back.
Refunds need a specific permission
The refund button only works for staff with the refund permission (bill.refund). Without it, the button is disabled or the request is rejected.