BOOK 24/25Staff & system
Printer setup
Everything for kitchen/bar/receipt printers lives on this one page — add printers, decide which menu prints to which machine, adjust the receipt/order-ticket layout, and check recent print job status plus the retry history whenever something won't print.
Printers
Open the printer settings page
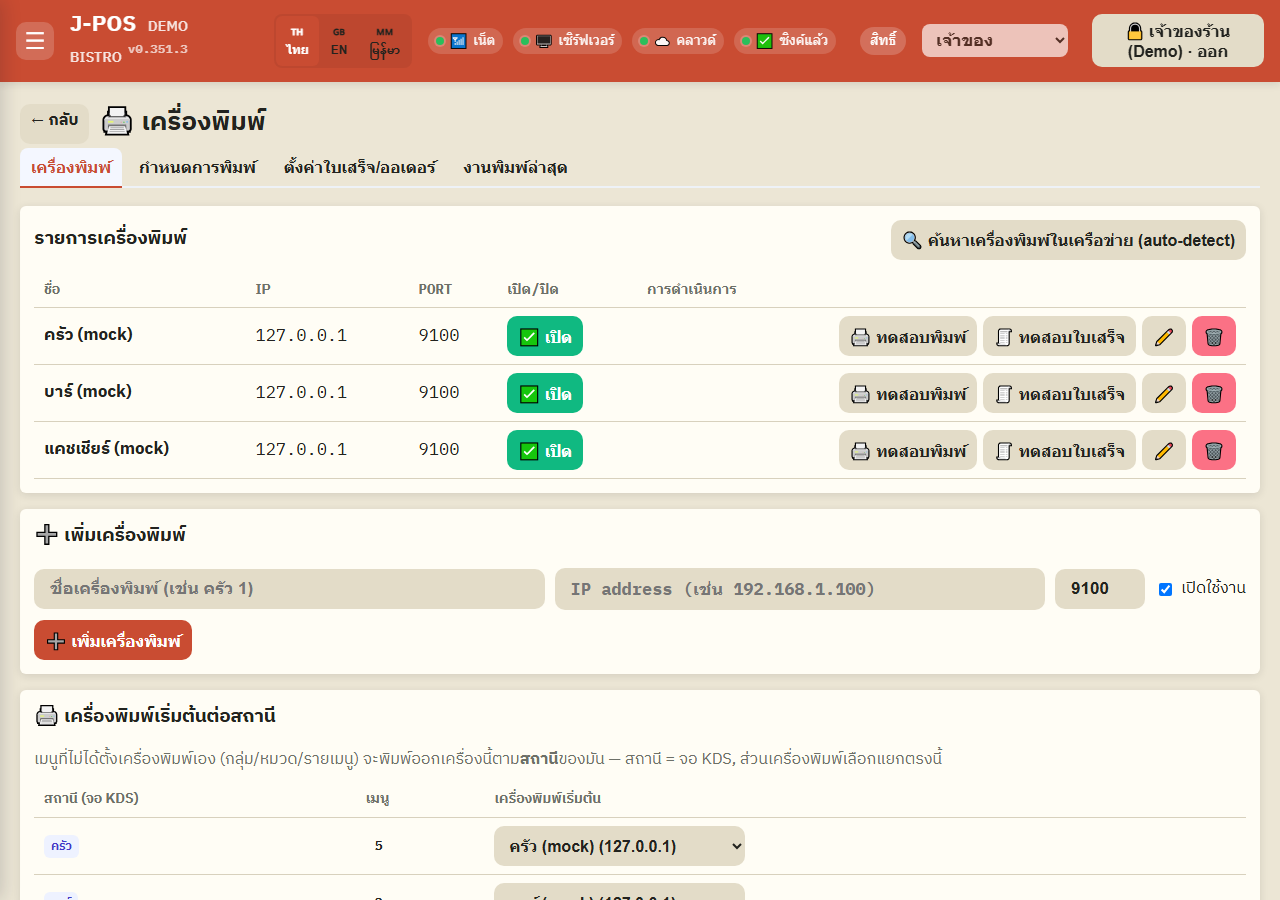
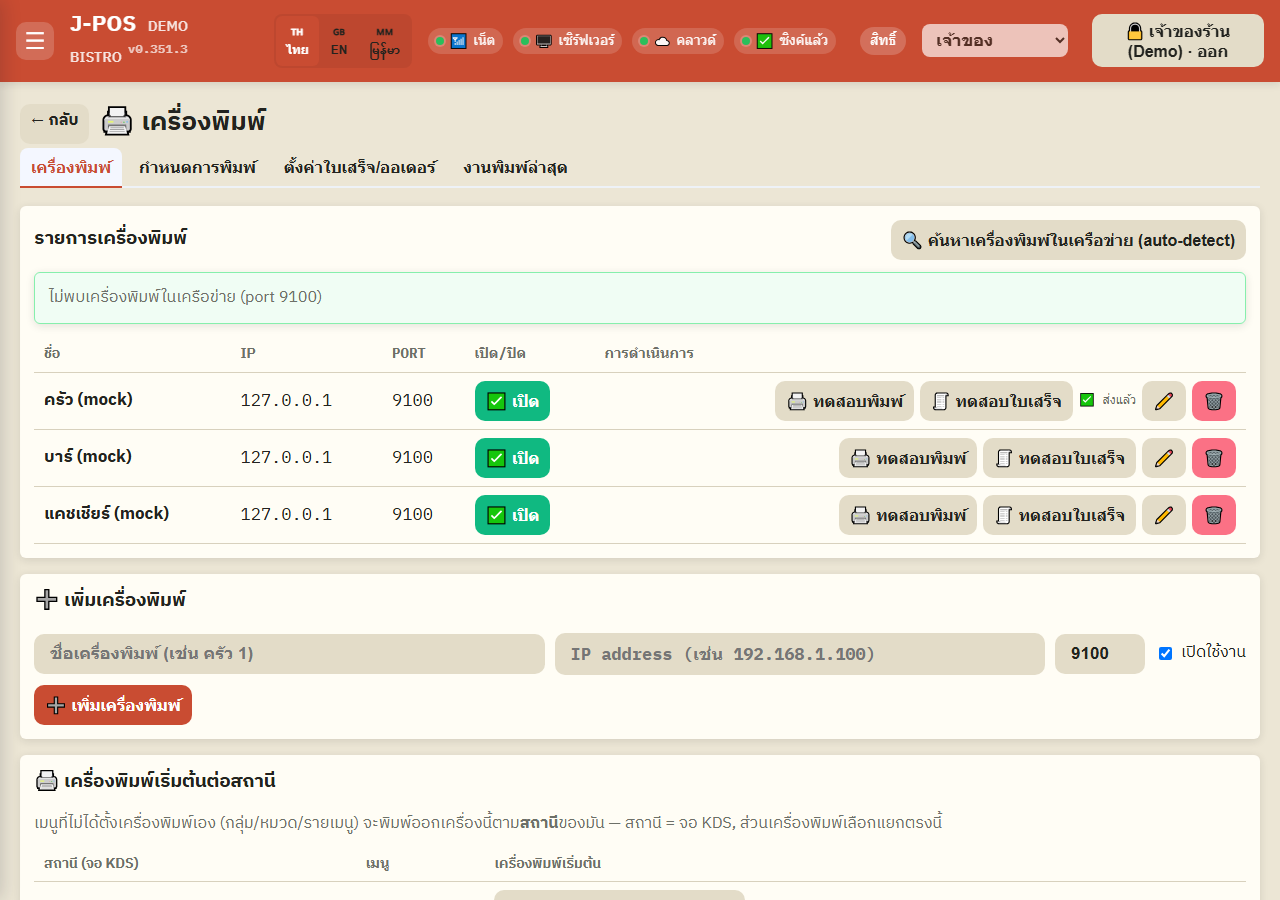
Settings → Printers (requires the “Manage settings” (settings.manage) permission to get in) — the table lists every printer with its name, IP, port, and enabled/disabled status.
Each row has buttons to test print, edit, and delete.
Open full size Auto-discover printers on the network
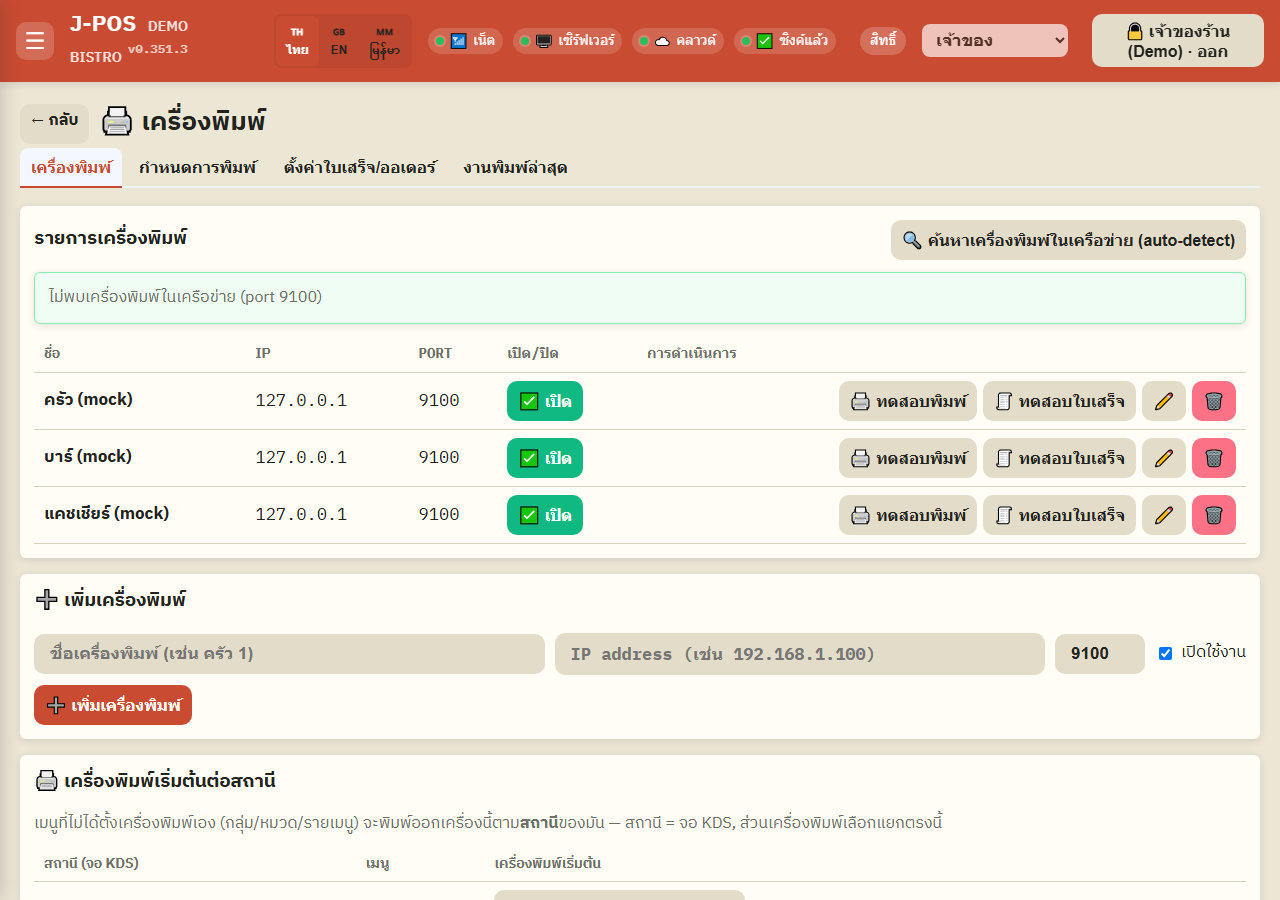
Press "Scan network for printers (auto-detect)" and the system scans the same network for devices listening on port 9100 (the standard ESC/POS kitchen/bar printer port), then lists every IP it finds so you can tap "+ Add" on each one right away.
Open full size Add a printer manually
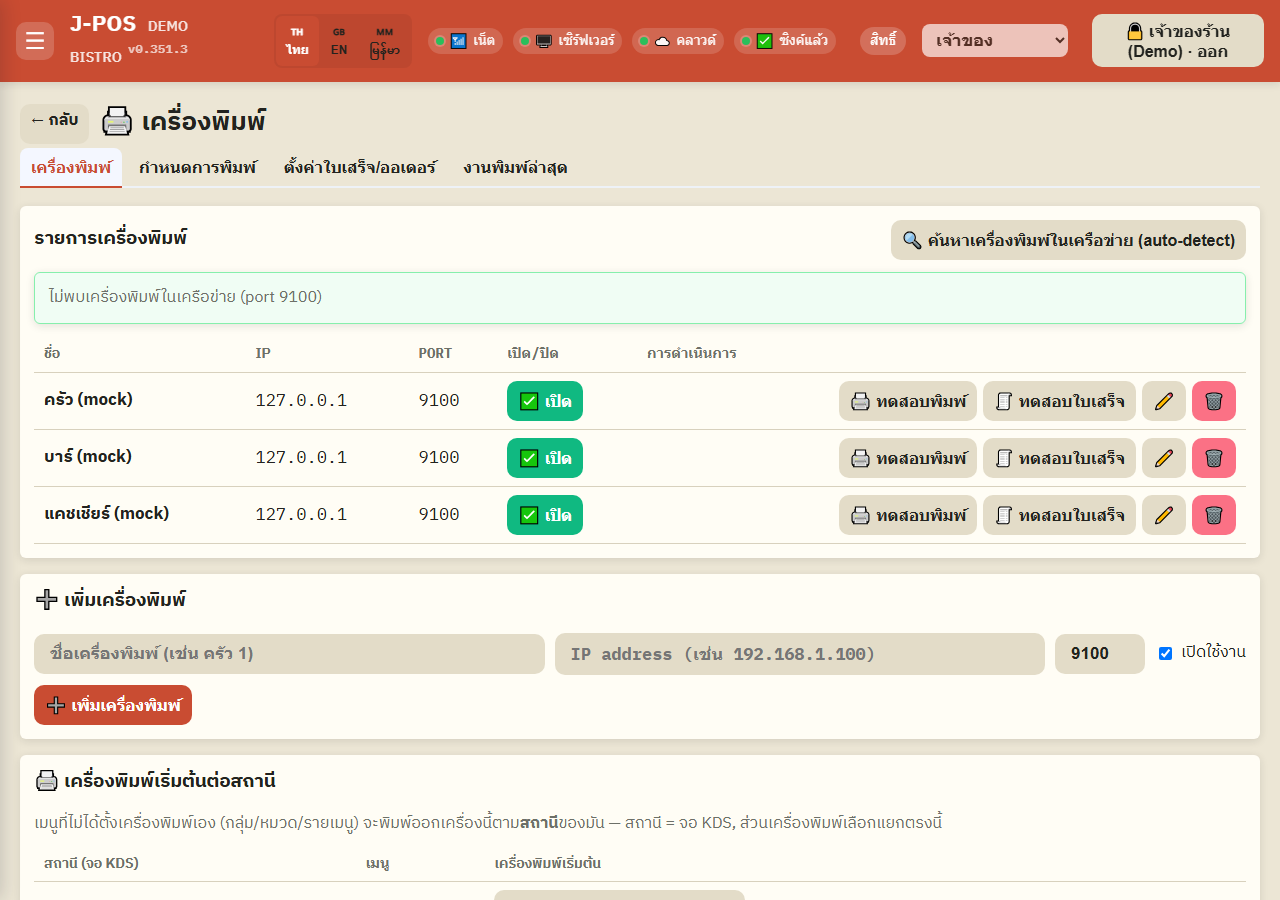
If you already know the IP, or the scan didn't find it, fill in the printer name, IP, and port (default 9100) yourself in the "Add printer" form below, and check "Enabled".
Open full size Test print
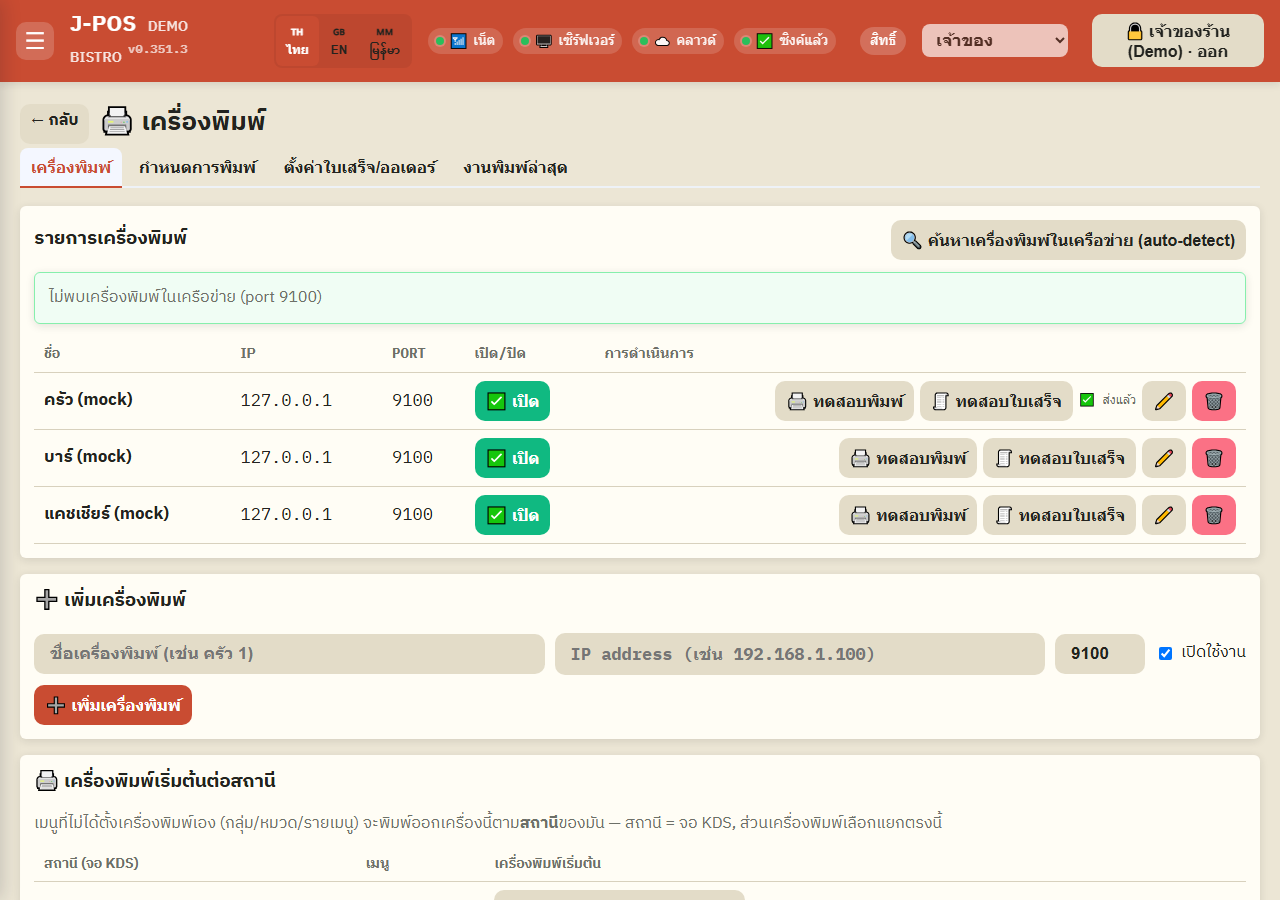
The "🖨️ Test print" button sends a plain-text test ticket to that printer — use it to confirm the connection actually works.
The "🧾 Test receipt" button prints a sample receipt that includes the shop logo — if the logo comes out, that printer supports graphics (raster) printing, which is required for Burmese text.
Open full size Default printer per station
The table at the bottom of this tab sets which printer each station (KDS screen, e.g. kitchen/bar) prints to by default — any menu item that hasn't been assigned a printer at the group/category/item level falls back to this default for its station.
Open full size
Print Routing
Assign a printer per menu item
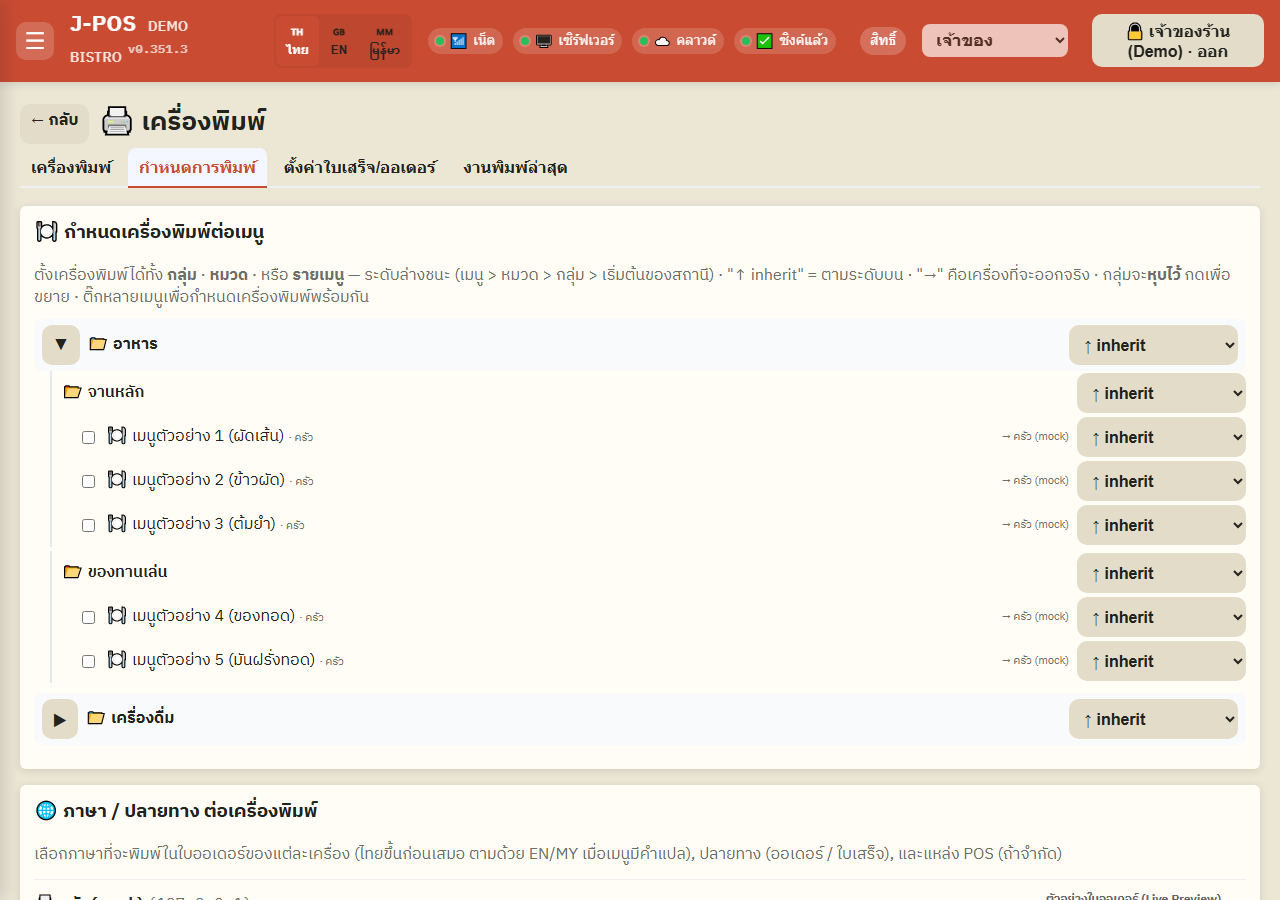
The menu tree on the "Print Routing" tab lets you set a printer at the group, category, or item level — a lower level always wins (item > category > group > station default). Pick "↑ inherit" to fall back to the level above instead. Next to each item's name, "→ printer name" shows exactly which printer it will actually print to.
Check multiple items at once and assign a printer to all of them in one go with the "Assign printer to selection" bar at the top.
Open full size Set language / output / raster mode per printer
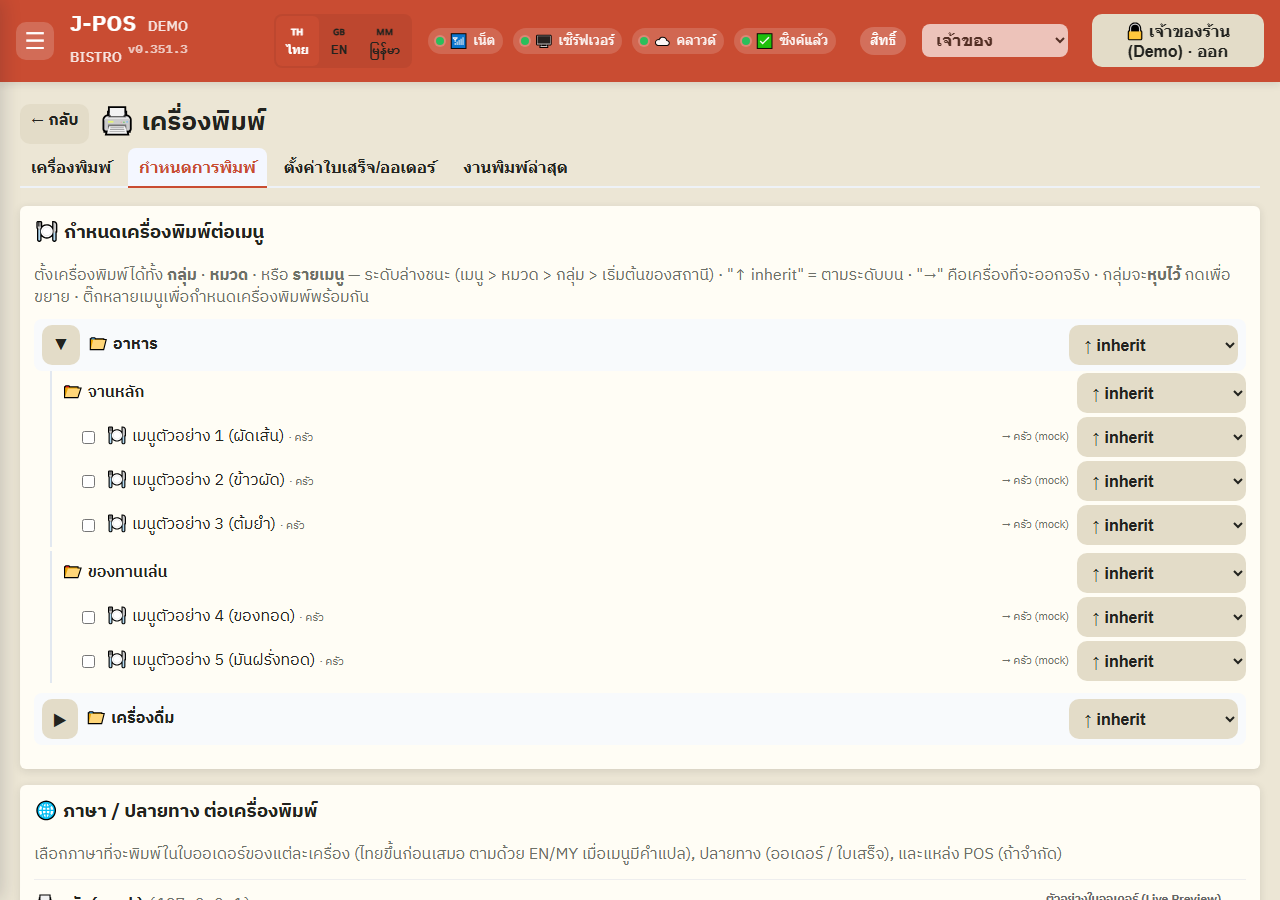
Each printer has its own order-ticket language settings (Thai/English/Burmese) — Thai always prints first, and EN/MY lines only appear for menu items that actually have a translated name.
Choose which output(s) a printer accepts: Order tickets, Receipts, or both.
Turn on "Print order ticket as image (raster)" only for a printer whose Thai/Burmese text comes out garbled — rendering the ticket as an image works on any printer regardless of its character set, at the cost of a slightly slower, larger print job.
Leave the POS source (posSource) field blank to accept prints from every cashier terminal, with a live order-ticket preview on the right.
Open full size
Receipt / Order Settings
Configure the receipt layout
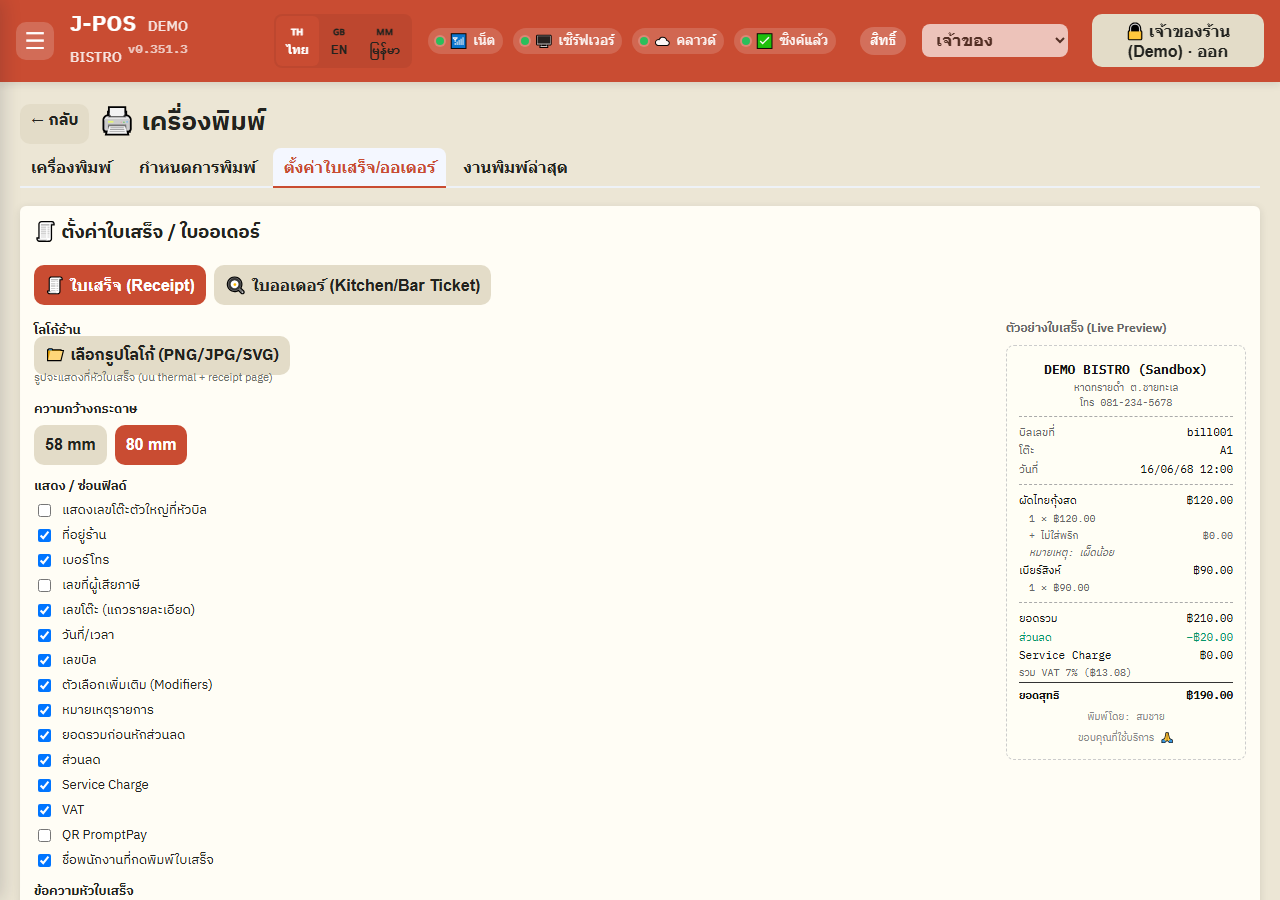
Upload the shop logo, pick a paper width (58 or 80 mm), toggle which fields show on the receipt (address, phone, tax ID, discount, VAT, PromptPay QR, and more), and add your own header/footer text — with a live receipt preview on the right before you save.
Open full size Configure the kitchen/bar order ticket
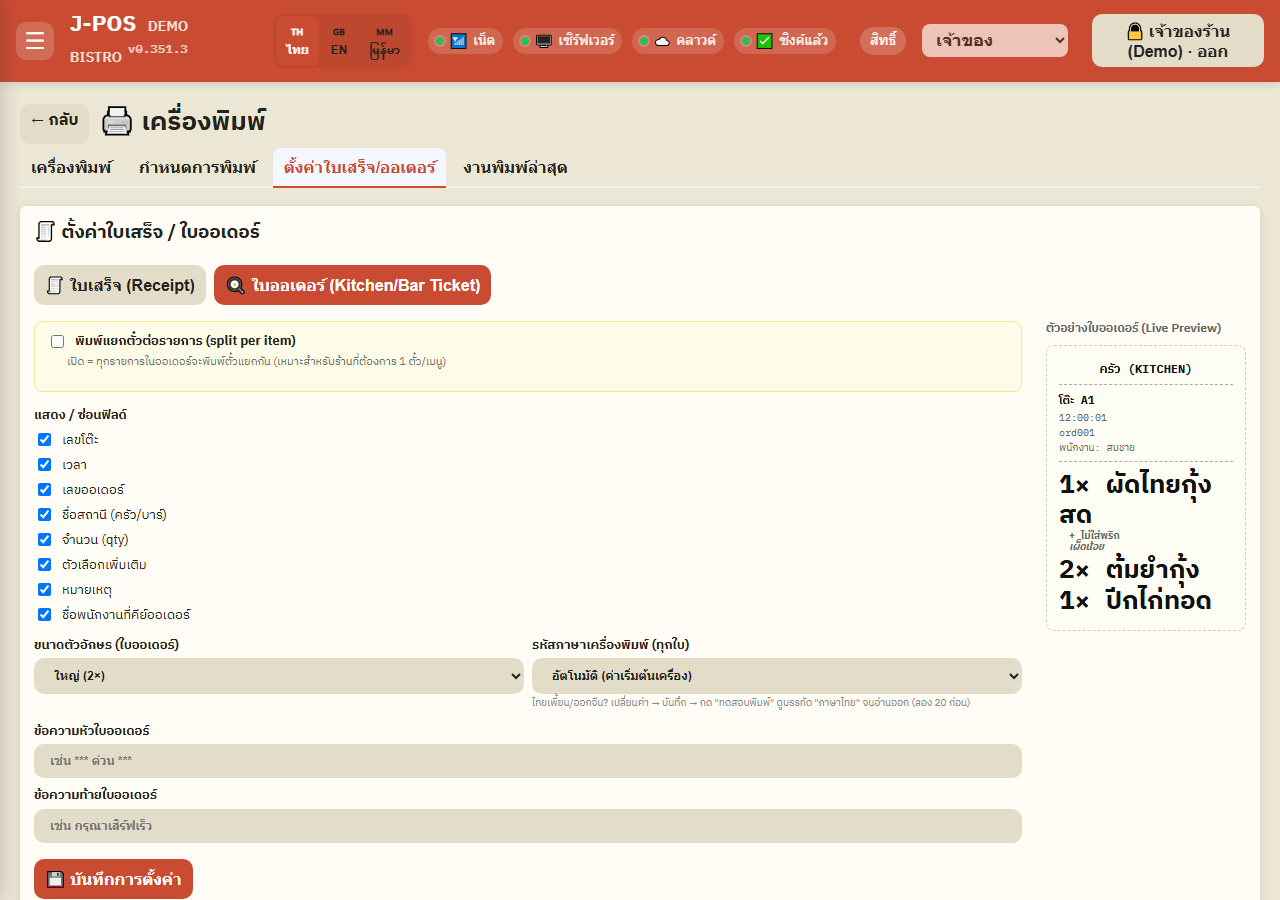
Switch to the "Order Ticket (Kitchen/Bar)" sub-tab — turn on "Print one ticket per item" if you want a separate ticket per menu item, adjust the ticket font size (normal/large/extra large), and pick the printer's code page if Thai text comes out garbled or as Chinese characters — try CP874 (20) first, then test print until it reads correctly.
Open full size
Recent Print Jobs
Check print job status and troubleshoot failed prints
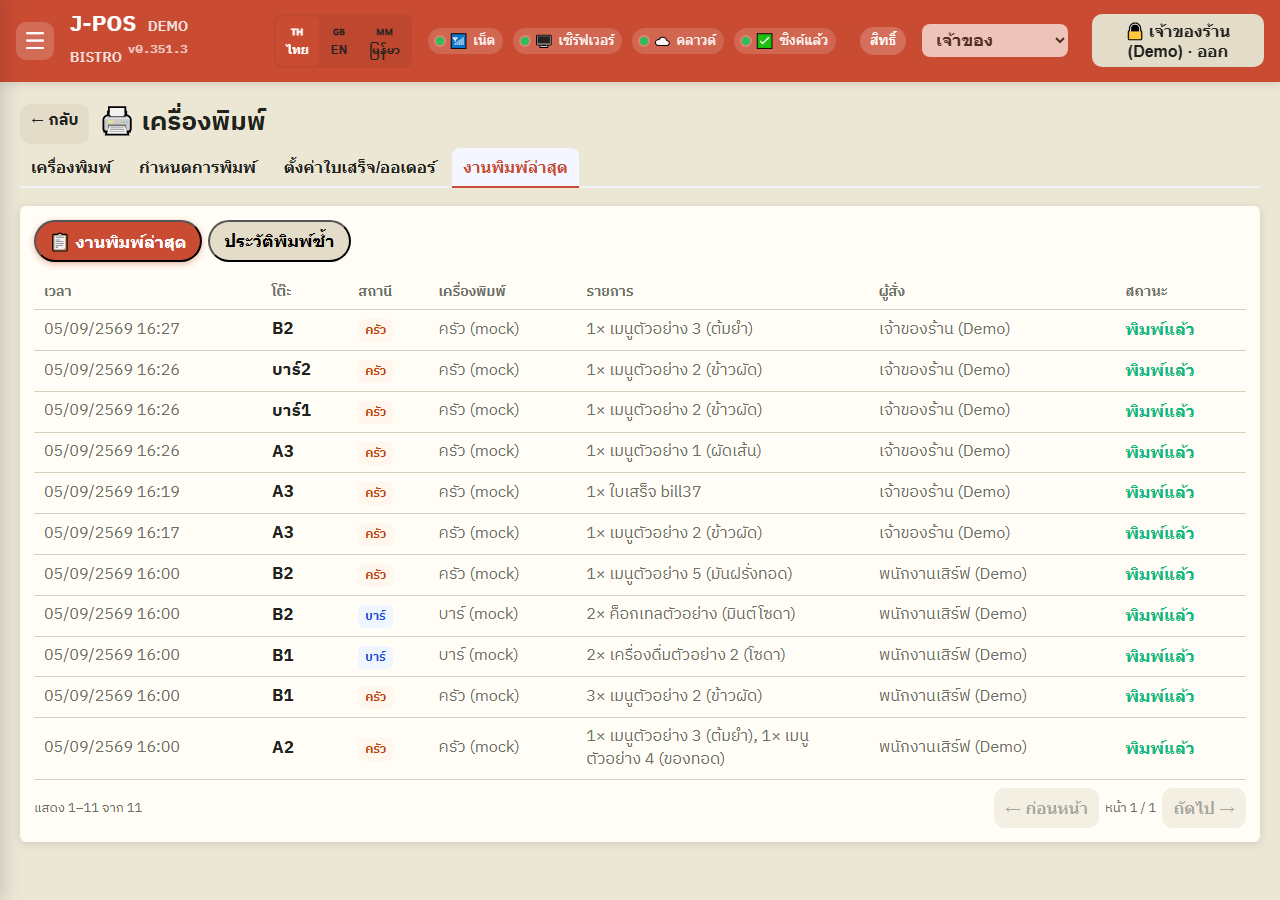
The "Recent Print Jobs" tab lists every print job (printed / queued / failed) with its error message and how many times it's been retried, if any.
A failed job is automatically queued for a background retry and logged to print_fail_log — switch to the "Retry history" sub-tab to see whether each attempt was an automatic retry or a manual reprint, and its result. If an automatic retry succeeds, the job disappears from the failed list immediately — the retry history is the only place that still shows it ever failed at all.
Open full size
Common points of confusion
A printer set but disabled doesn't fall through to the level above
The printer lookup (item > category > group > station default) stops at the first level that has a printer explicitly set, regardless of whether that printer is enabled or disabled — if the assigned printer is disabled, the system does NOT continue up to the next level (e.g. category to group); it jumps straight to the station default instead. To make an item truly inherit from the level above, pick "↑ inherit" there — disabling the printer alone won't do it.
Deleting a printer doesn't warn you about menus still pointing at it
Removing a printer doesn't clear the printer assignment stored on any menu item, category, group, or station that was pointing at it. Once the printer is gone, the system simply can't find it anymore (same as a disabled printer) and silently falls back to the station default or the first enabled printer instead — there's no warning that a menu was still assigned to the deleted printer. Check the "Print Routing" tab after deleting any printer.
A receipt-only printer is never picked as the order-ticket fallback
When nothing else claims a printer, the system falls back to the first enabled printer that accepts "Order" output (labelled "(fallback)") — a printer whose output is set to "Receipt" only is skipped as a fallback for kitchen/bar tickets.
You can't turn off Thai or clear every output
Every printer must keep at least one language enabled — Thai in particular can't be fully turned off (dropping to zero languages snaps it back to Thai automatically). The same applies to output: turning off both Order and Receipt snaps it back to "Order". English/Burmese lines only appear on an order ticket for menu items that actually have a translated name — an item with no translation still shows Thai only, even with that language enabled on the printer.
A ✅ on test print doesn't always mean it actually printed
The test-print result reflects what the printer itself reported back, not just whether the page's request to the server succeeded — you can sometimes get an error message instead of ✅ even though nothing on the page errored. If you see ⚠️, check the short error text shown next to the button for the actual reason.